
I have begun a foray into String Pull Painting. After seeing a few videos on Utube I thought I would like to try this process on some of my wood turnings.
After some or should I say lots of experimenting I have been able to add this style of painting to a few of my pieces.
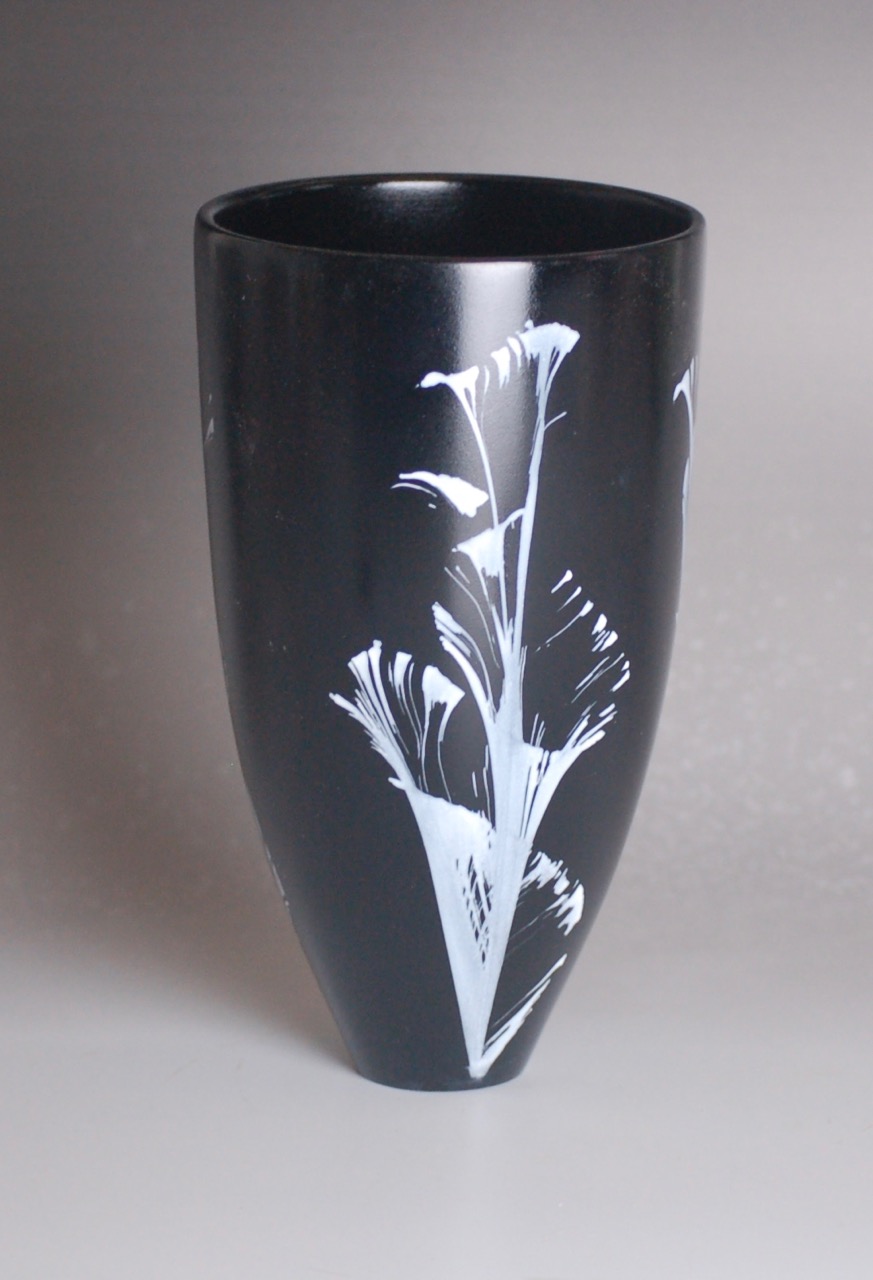
I did a couple of monochrome and one on clear coated Silver Maple. None of these pieces of Silver Maple had much character and by adding some paint I think they are now something anyone would want to own and display in their home.
I started out thinking I had to trap the string between the object I wanted to paint and some sort of flexible pad. At that time I was trying to paint multiple colors at once as well but have since decided that by the time I get the string ready I have lost the effect. But I will still pursue this because I am intrigued by the second photo below.


Next I watched more video and found one where the string was just set on the wooden object and pulled without being trapped. This process seemed to me to be much more ‘user friendly’. Bending a pad around a turned object to trap the string was not an easy task. I did try to use some foam sheets and you can see the results above.
I have probably pulled 50 strings on various turned pieces over the last few days and have only 11 ‘flowers’ that I felt were successful.
Thankfully acrylic paint is fairly cheap and easy to remove if washed promptly with water. In some instances I waited too long and had to sand the paint off with fine sandpaper or a fine abrasive pad. In these cases I was forced to refinish the item either by applying more lacquer or spaying on another coat of paint.
I have tried painting over a fine sanded surface (1000 grit), straight on a painted surface and on top of several coats of lacquer. If you decide to try this technique I would recommend that you have 5 or more coats of finish sanded between coats to keep the surface fairly flat this will allow you to sand off the ‘oops’ without going through the finish. Be sure to allow whatever finish you choose to fully dry or the acrylic paint will be very hard to remove.
So many variables!
– SURFACE PREPARATION: this seems to make a difference in how the sting slides or doesn’t slide and also in how much paint is left behind. I would imagine that temperature, humidity etc. might also impact the technique.
– PAINT: I am using cheap acrylic paint. I find it a little thick from the container but found when thinned with a little water and then mixed about 3 parts paint to 1 part Flotrol works good for me. The final thickness of the paint is going to impact the work depending of course on the string as well.
– STRING: this is a very interesting aspect. I read where people use thread, string, wool, chain etc etc. Most of my work is on the smaller side and what is needed for this is a material which when loaded with paint bends easily so it can be placed where you want it to go and not where it decides to go. The work I show here was done primarily with a single strand from a string of what I think is cotton. I did try cotton thread but found the paint tended to ‘bead’ along it’s length and I had trouble controlling the amount of paint but I intend to see if I can find a bit larger cotton thread. Cotton seems to be more easily positioned.
-OTHER ITEMS: I tried a few different sizes of small chain without success but it may be something you might like to try.
I usually place a small plate under my turning which is mounted in some manner on the lathe. You might notice that I have a tray under the work to minimize water getting on th lathe ways and I have also added a slide-on extension table the can be positioned along the ways to give me more ‘table’ space.

Using my lathe to hold the piece allows me to lock the spindle and thus have the piece held firmly so it can’t rotate while I apply this technique. I put the mixed paint onto the plate and lower the ‘string’ into the paint. I have found that when lifted the first time there may be voids so I lift it and gently run it between my gloved fingers to evenly spread the paint. I usually dip it twice but at this point I found that there is wayyyy too much paint on the string and this make a really dark ‘flower’ without much detail so I very gently draw it through my fingers again before placing it on the piece. It’s easy to remove too much paint which leaves what I deem too faint a ‘flower’.
The string is placed across the piece starting at the top and weaving to the center of the bottom. At this point I like to try to ensure the string is touching the piece along its entire length. I will tap or press it lightly with a mixing stick or other small item to make sure it contacts the piece over it’s entire length. This seems to help make a more defined ‘flower’. The string is then held by gentle finger pressure at the bottom of the item to ensure it gets pulled off the piece in the same location or there will be a wide band of paint at the bottom. I found that if I was able to add a bit of wood at the end of the piece (see photo below) and hold the string away from the base of my piece, I minimize paint blobbing at the end of the base. I did also find I could very gently wet sand the base (with 1000 grit) to tidy it up a bit and when the final finish is applied the sanded area blended well into the rest of the piece.

I found it really easy to overdo the effect and place too many ‘flower’ on a piece especially when the piece is of a smaller nature.
Here is a progress photo of the piece that was left natural with a green/black flower which I highlighted with a little pink after I took the photo.

If you decide to try this technique I have a few suggestions:
- Don’t be afraid to remove/wash off what you don’t like and don’t get frustrated if you don’t get what you consider a good ‘flower’ the first few tries.
- Leave a small, smaller than the base, tenon on the piece. This tenon will allow you put it back on the lathe if you need to re-sand and refinish the piece AND it is a good place to hold the string when pulling to keep paint blobs off the bottom of the piece.
- Experiment with the paint and string to find what works best for you.
- Don’t limit yourself to anything you see here or elsewhere experiment and be prepared to fail. I often try different techniques on paper first to see what effect I might wind up with.
- Have all your supplies ready and handy. Lots of paper towels, water and string to try.
- Have FUN!!!
