Recently I decided I needed some small hollowing tools because I really like to hollow through small holes.
I started to make my own but Christmas came and I was given a gift certificate to my favourite Toy Store “Lee Valley Tools”. So I decided it might be best to purchase a small set of tools.
I had done a lot of research on the subject and pretty much knew the size I wanted. I was looking for 3/8″ diameter and would like to hollow through a 1/2″ or 5/8″ hole. I bought the Kelton mini hollowing set which has one straight and two progressivly bent cutters. The store didn’t have any on the shelf but had a set on display complete with wax/plastic cutter protectors and I decided buy them.
I was pretty excited, lots of good reviews so I could hardly wait to give them a try. My excitement abated pretty quickly after I got home and when I pulled off the protectors. The ends were very jagged and would need a good grinding to get them smooth and round. They looked very much like a lot of things I see which are made offshore, although I am unsure if this is the case.
After a little soul searching I decided that I didn’t want to grind them round and then find out that they didn’t work well as I would then no be able to return them. Incidentally, every one with whom I discussed these tools rated them very high BUT to a turner they all said the only way to sharpen them was to lightly stroke the bevel upwards with a diamond hone. As well, I was cautioned not to grind them and to never touch the top of the tool as this is where the very thin hardened cutter was and it could be damaged or removed very easily!
So back to Lee Valley to return.
I already have a 1/2″ set of John Jordan hollowing tools and like them vey much especially when used in my Kobra Hollowing Rig, so I decided to order his 3/8″ set. Still waiting for it to arrive.
Now, as I said I had originally planned to make my own and while I was waiting the 3/8″ cutters that I had ordered from JJ arrived at my shop I decided that I might as well make a couple of tools cause I now had all the parts.
First I used my wood lathe to drill 3/8″ holes in the ends of two pieces of 3/8″ drill rod.
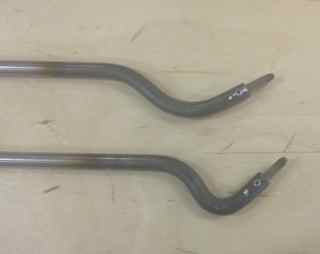
Then using the John Jordan bent tool as an example I proceeded to heat and bend the both bars, one with a slightly less bend than the other. I do find that with the JJ tools I have trouble getting back up near the opening and hoped by creating one tool with a little more bend it might help me.
As you can see from the photo, I installed a small set screw to hold the cutters and if you look close you will see the the tip of the cutter lines up with the centre of the shaft. I would have like the bends a little closer to the end of the bar but because I had already drilled the holes for the cutters I couldn’t bend past the end of my hole.

The problem I was dealing with was how big a hole to drill in the 3/8″ rod to hold the cutters.
As you can imagine the larger the whole the less material is left to support the cutter and to thread for a set screw.
I had been told the easiest way to attach the cutters is with CA glue but I have made a little jig to sharpen the cutters and need them to be removable in order to use my jig.
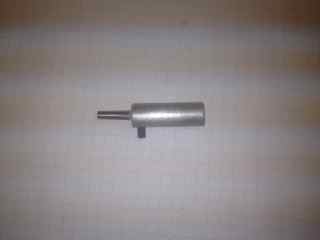
Looks a little like this but can be modified to change the sharpening angle.

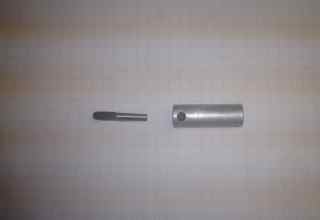
JJ tools come with square cutters that have the end that is inserted into the bar turned round to enable it to fit in a 3/16″ hole.
I quickly found a short section of 1/2″ aluminum round stock. Drilled a hole in the end to hold 3/16 square. Drilled and tapped a hole for a screw to hold the cutter in place and found it pretty easy to mount in a drill and run against my grinder to round the end.
Now all I have to do is try them . . . .
If you have any questions please feel free to post here or email me.


