I am sitting in Kauai waiting for the rain to stop. I know, poor me, right? At any rate, I thought this would be good time to let anyone who is interested know what I have made to buff my wood art.
I should start by saying my journey started with the Beale Wood Buffing System. That’s the one with the three 8″ buffing wheels. It works like a charm but for me the closeness of the wheels to each other and the fact that I had to use my lathe made the system somewhat less than ideal. I do however continue to use the Beal Balls to do the inside of bowls, this I now do very infrequently.
I often watch local Auctions and saw a really nice two wheel buffer for sale. It had 2 12″ wheels, a 5 hp motor all on a stand etc. I just had to have it. It was ok except for the fact that the buffing wheels were meant for metal or something and were sewn together in a spiral patters. I took a sharp knife and removed most to the sewing to make them a little softer. As you an see from this photo I had to make a few modification. The wheels were set up to be in the center of the stand which wouldn’t allow me to access the buffing wheels as much as I needed. Another issue was the the motor needed to be physically moved to a different location any time I wanted to change the speed.

This buffer had 3 step pullys which did allow me with a little fussing to get a speed that worked. The problem was that the stand and set-up was just a little big for the space I have in my shop so I advertised and sold it locally. In retrospect I probably should have kept the parts and junked the stand but that’s water under the bridge.
I kept watching auctions and soon located a older but still very nice long shaft Baldor buffer. Got it home, set it up with my existing wheels but quickly discovered that the 3350 rpm speed was way too fast. I did a lot of research on the net to try to find a way to slow this puppy down without success. I must admit what with the technology available today that no-one (read here the Chinese) have not come up with a cheap speed reducer for a 110 brushless motor. So once again this one went on the market and was grabbed right away. Oh, in the background you can see the Danish built bench grinder I also got at another auction. I didn’t even know it was included as it was hidden in the bottom of a metal cabinet I bought. Adding to that I didn’t know the Danes made stuff like this but it is a gem! Quiet, powerful and runs as true as any bench grinder I have see.

Before selling the Baldor I had decided that what I need to do was to build my own. Over the past many years I have collected quite a few bits and pieces of tooling and felt confident that with a small outlay of cash for a few items I would have no trouble making exactly what I need.
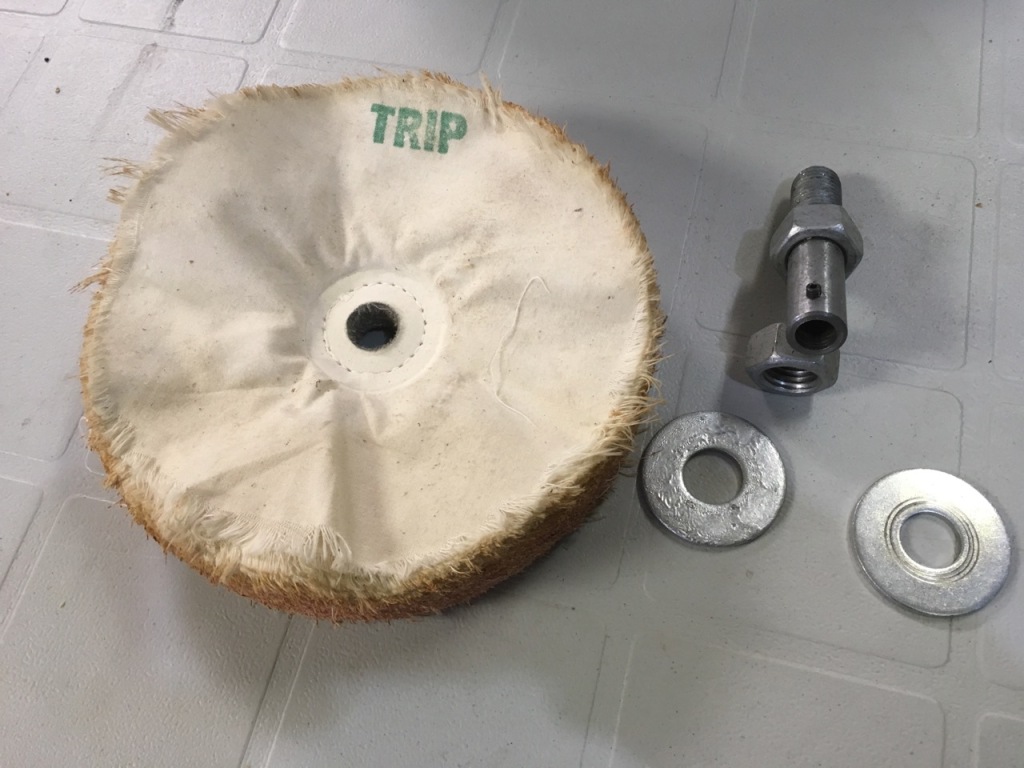
I should mention that while I had the Baldor I made 3 attachments one for each of the three buffing compounds I use Brown (tripoli), White (rouge) and Wax (carnauba). To make these I simply cut the heads off of 3 3/4″ bolts. I think I use 4″ bolts. I then drilled a 1/2″ hole it the end without the threads and drilled and tapped for a set screw to hold them in place on the motor shaft. By adding two nuts and washer I had easily replaceable arbours for my buffing wheels. I knew that my next model needed to be able to utilize these pieces.

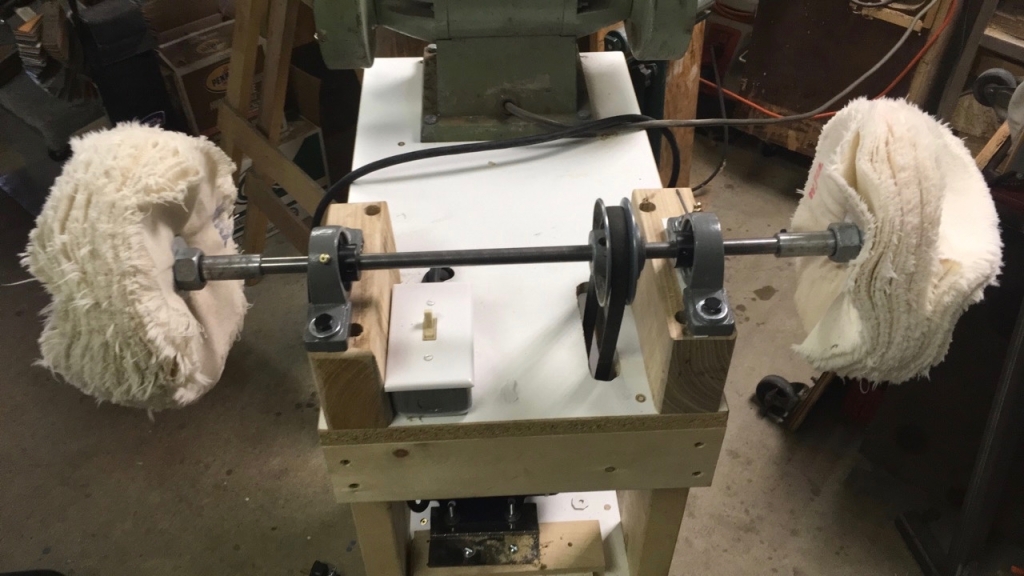
On to the build. From Princess Auto I purchased two 1/2″ pillow blocks and a 5′ section of 1/2″ steel rod. I already had the bench, I wanted to share with the Bench Grinder so all that was left was to put a motor on the lower shelf, cut a slot for a V-belt and mount a length of 1/2″ shaft and the pillow blocks. I had a motor (1725 rpm) I had saved from a clothes dryer and also had a couple of 1/2″ pulleys. I didn’t take a photo but I do keep all three buffing heads in plastic bags to ensure I don’t add bits of metal or other items that might scratch my turnings. I raised the pillow blocks to get a more comfortable height for me and hinged the motor to allow it weight to tension the belt automatically. The pulleys are the same diameter providing me 1725 rpm but should I find the need to change speeds a simple pulley switch will do the trick.
Please don’t hesitate to ask or make suggestions for future posts or to comment on this one.

What a get project. Always thinking aren’t you.
LikeLike
Comment by Dave Fritz — February 5, 2018 @ 7:08 am
Thanks Dave,f I never know if anyone is following. It was a pretty easy project and soooo useful. Still not sure which polishes better lacquer or Poly. These are my two go to finishes one is easy the other may polish better. Thanks again fo taking the time to write.
LikeLike
Comment by peteblair — February 5, 2018 @ 10:06 am
I’m searching for this kind of in-depth article. At every step of this article, you sheared a photo that helps to understand the topic clearly.
Thanks for sharing your idea and I would like to share it with my friends!
LikeLike
Comment by Curren — January 21, 2021 @ 1:22 am
Yes! Poor You!!!
We love Hawaii but have missed out last three trips due to the pandemic.
Thanks for the comment and I am most pleased that you like the post and I hope your friends do as well.
LikeLike
Comment by peteblair — January 21, 2021 @ 6:46 am