For a couple of reasons I have spent a few hours over the last little while making my own Jamieson style Hollowing rig.
One reason is because I just like to make stuff and another is because I wanted to see if this style of hollower would be easier to set up and provide more tactile feel when I hollow small vessels.
I am lucky in that I have a Kobra Hollowing System and find it great when hollowing larger forms but sort of clunky and overkill on small forms.
I also am the sort of person who has never liked to do anything twice if I could avoid it and so wanted too be able to utilize some parts from the Kobra and anything else I already have on hand.
I did test it today and found it easy to use but possibly not as easy to set up as I had hoped.
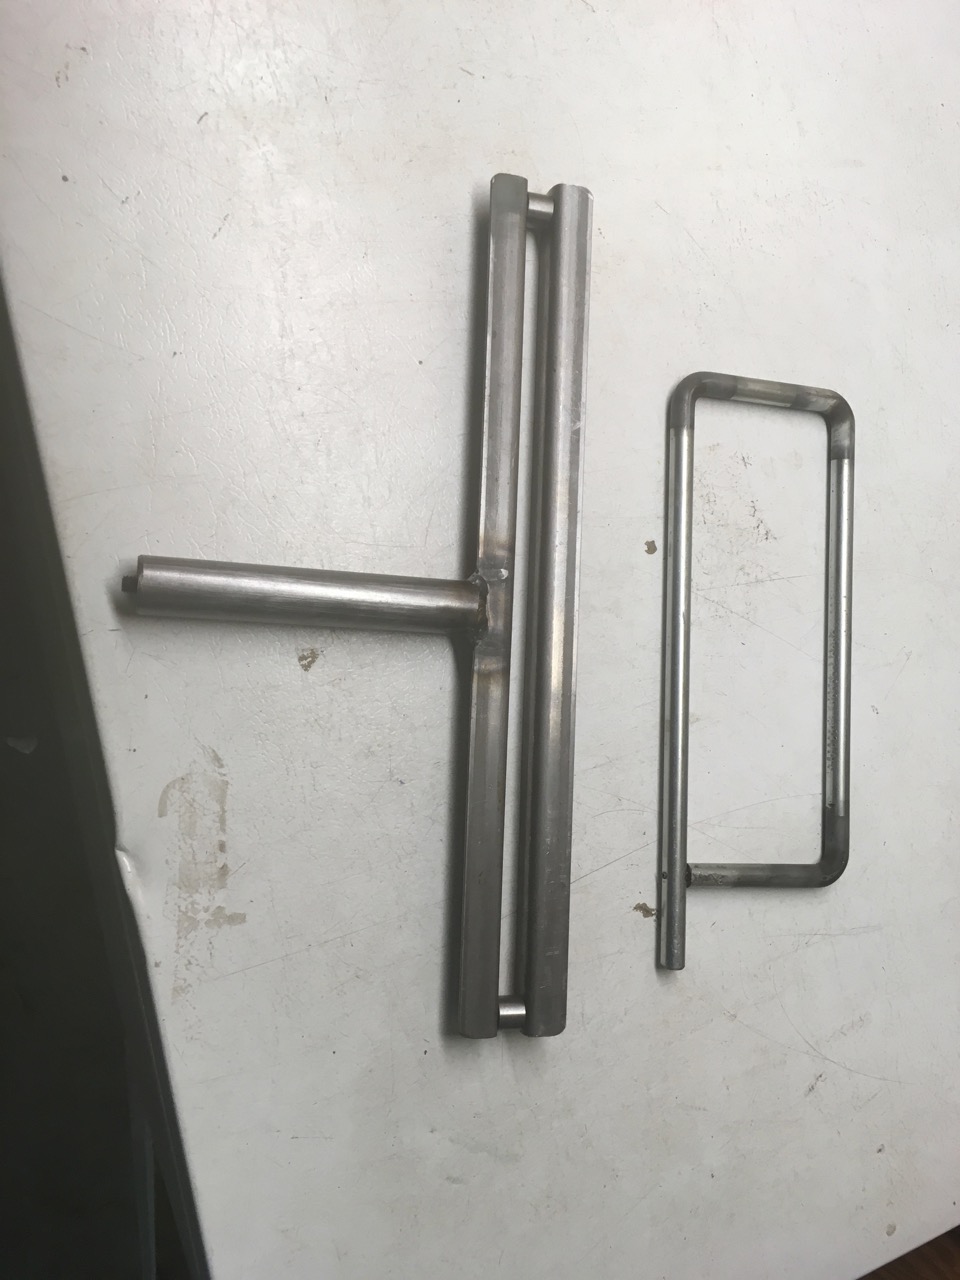
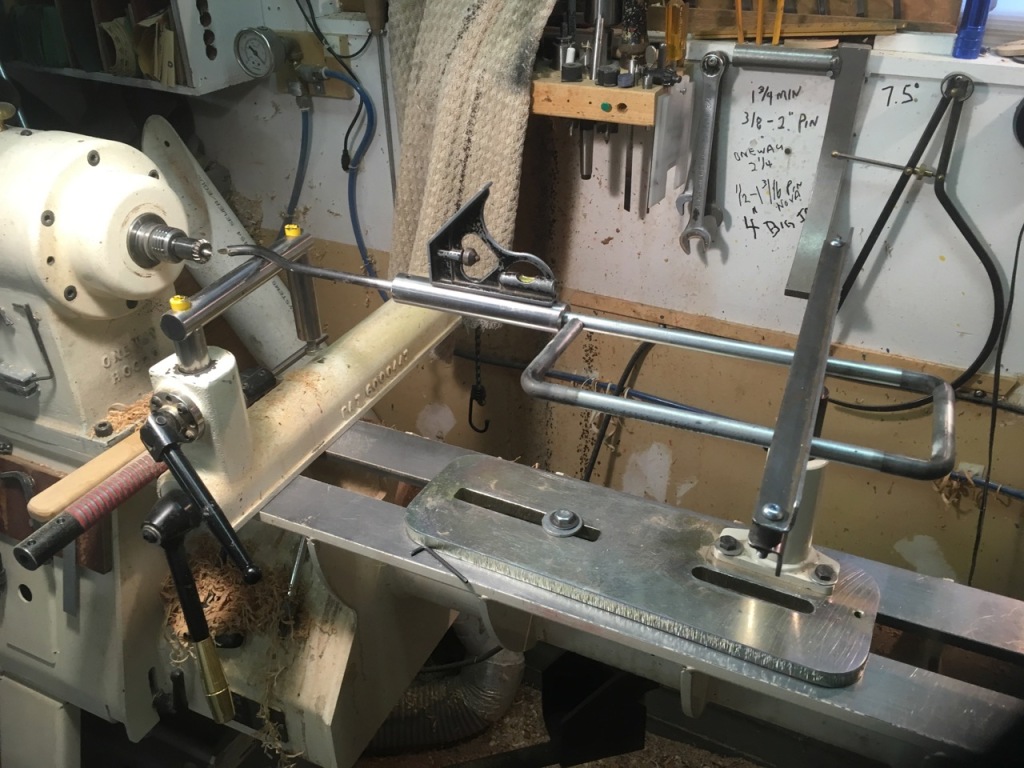
OK, here we go. I first decided that I needed to make only the two major components (the frame and arm) and as I said, I wanted to be able to adapt what I already have in the shop where possible.
I planned to use existing cutters and cutter holders and now know I want to utilize the laser and camera I already have as well as the tool post support from my Oneway Easy Core jig and the tool support from the Kobra.
I hunted around the shop to see what sort of material I had on hand that I could use. I found a three foot piece of 1/2″ steel rod and also a three foot piece os 1 x 1 x 1/8 angle iron. These two pieces should fit the bill.
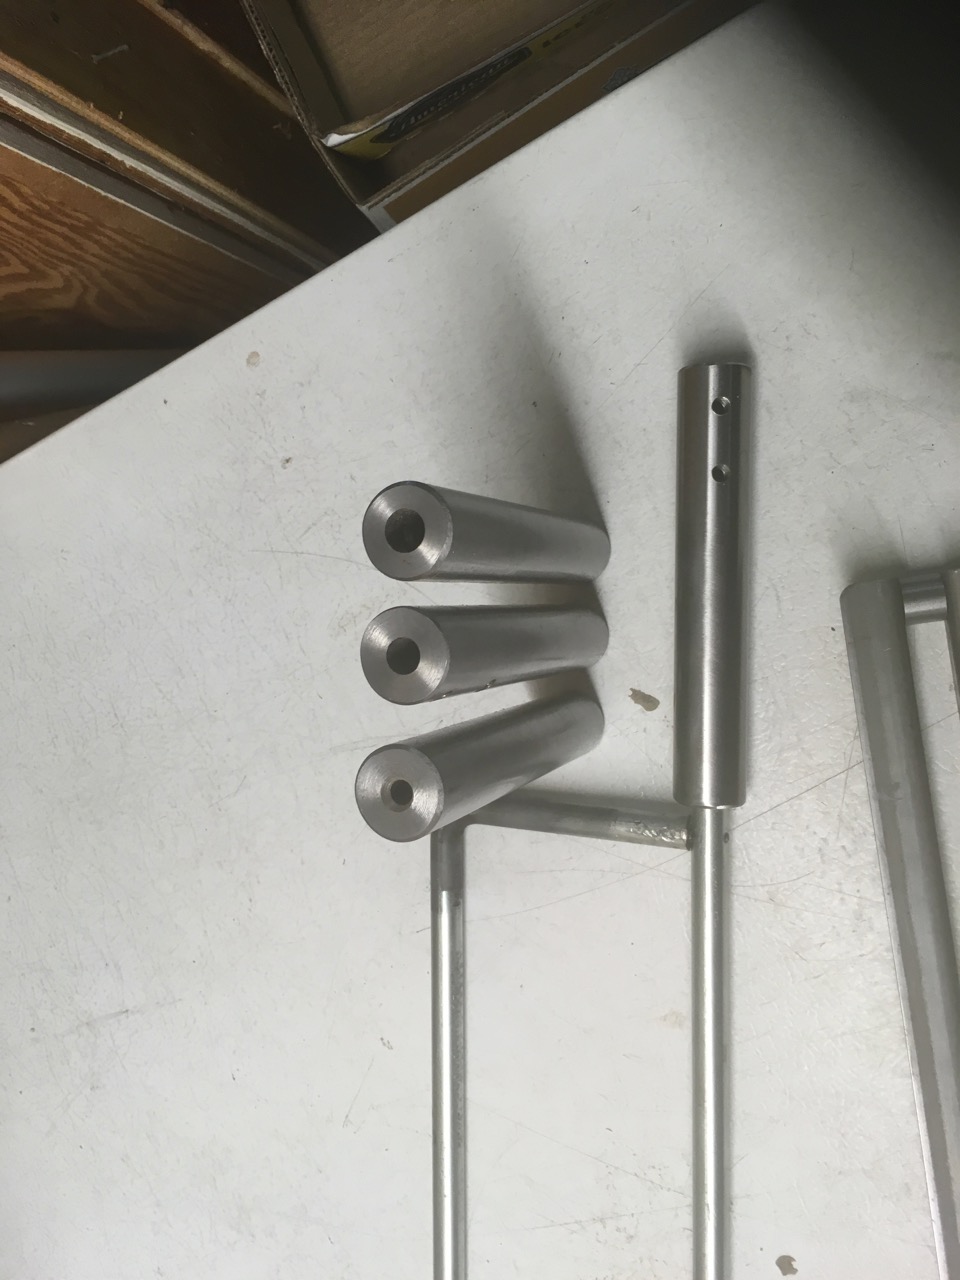
My first dilemma was to decide if I should cut and weld the tool holder arm or just bend it. I know of others who welded theirs but thought what the heck I have a small torch with Mapp gas which I felt would do the job. I marked the 1/2″ rod to allow me to produce three bends and have a little stub left for attaching the tools holders to. Oh, by the way, the tool holders I am using were made for my Kobra by a good friend but because they are designed for smaller cutters I seldom used them. I had to drill a 1/2″ hole in each of the four different size ones to allow me to hold 1/4″, 5/16″,3/8″ and 1/2″. After drilling the hole I also needed to drill and tap two holes in each to allow me to fasten these to the tool holding section.
I think I may have just been lucky when I heated and bent the three bends I did the bends only by eye and they came out flat and the final bend actually came out just about exactly the right length. I drilled a hole through the rod and into the end of the bent section and tapped in a ‘1/8″ Roll Pin.
Next to make the support stabilizer. Again I was lucky enough to find a section of 1″ diameter solid steel about the correct length. I cut a notch in one end about 1/2 way through and about 1″ deep.I had planned to bolt the bottom section of angle into this notch but changed my mind and got help from a friend to weld it instead. Glad I did this as it is much much more solid. The bottom was drilled and tapped to take a 3/8″ grub screw. I need to do this I think because when I change sizes of cutters I also have to change the height of the holder to ensure I am cutting on or just below center.
Next I needed spacers that were just slightly longer than 1/2″. Here my small metal lathe really came in handy. I was able to chuck up a couple of short pieces of 1/2 tool steel and precisely make the length I wanted. Because I am not planning to do any larger work with this tool I wanted the two parts to slide easily inside one another.
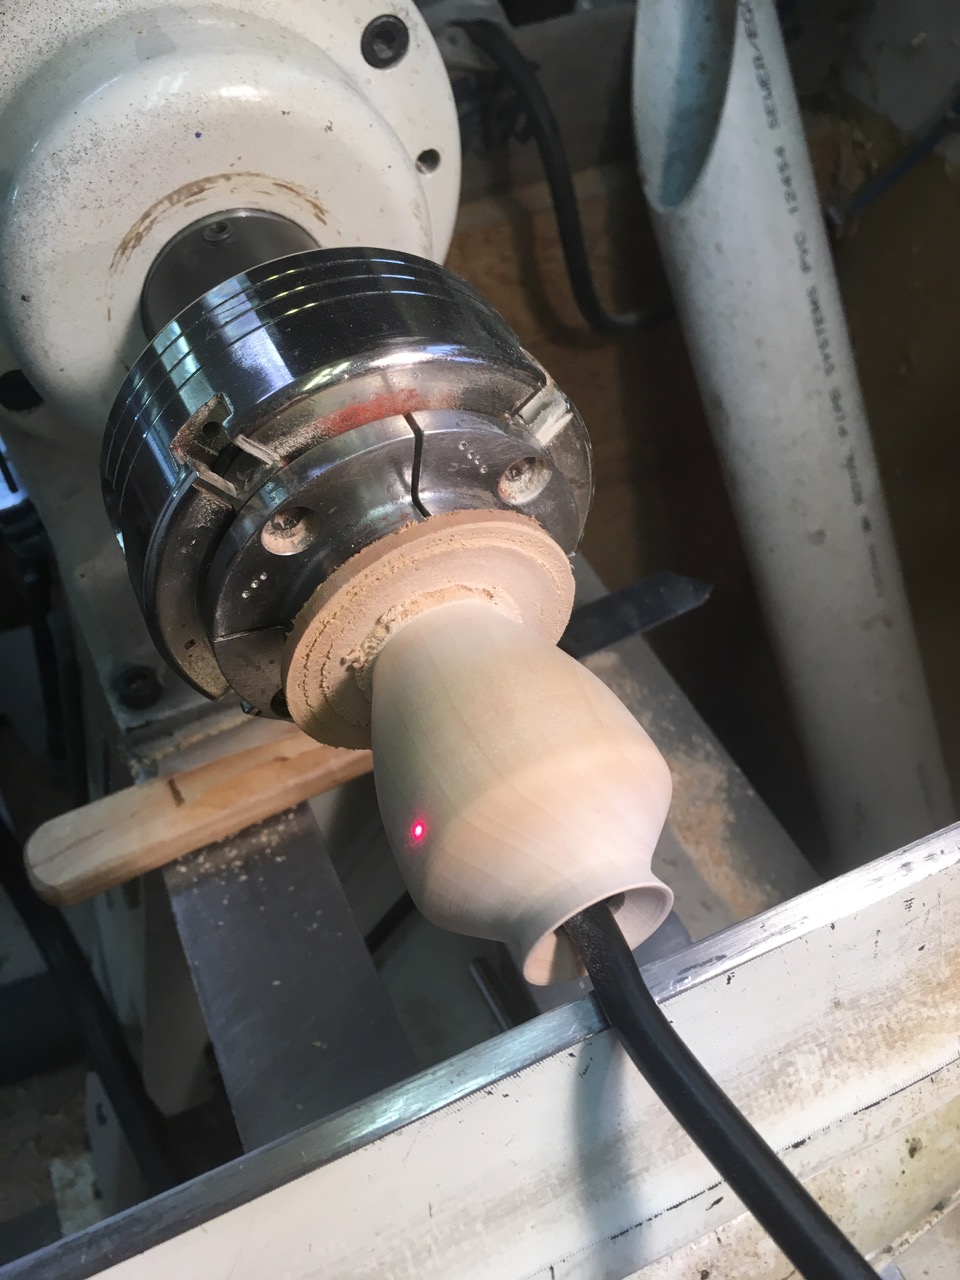
After bolting the angle together with 1/4″ bolts and lock washer with my prepared spacers in between it was time to test the rig. Today I chucked up a small piece of Gravenstien Apple and began the test. I want to be able to work through a small as possible. This means that I can use 1/4″ tools through a 1/2″ hole but even at this the tool does drag a little on the bottom of the opening. I believer the ideal size of opening should be just larger than twice the diameter of the cutter bar.
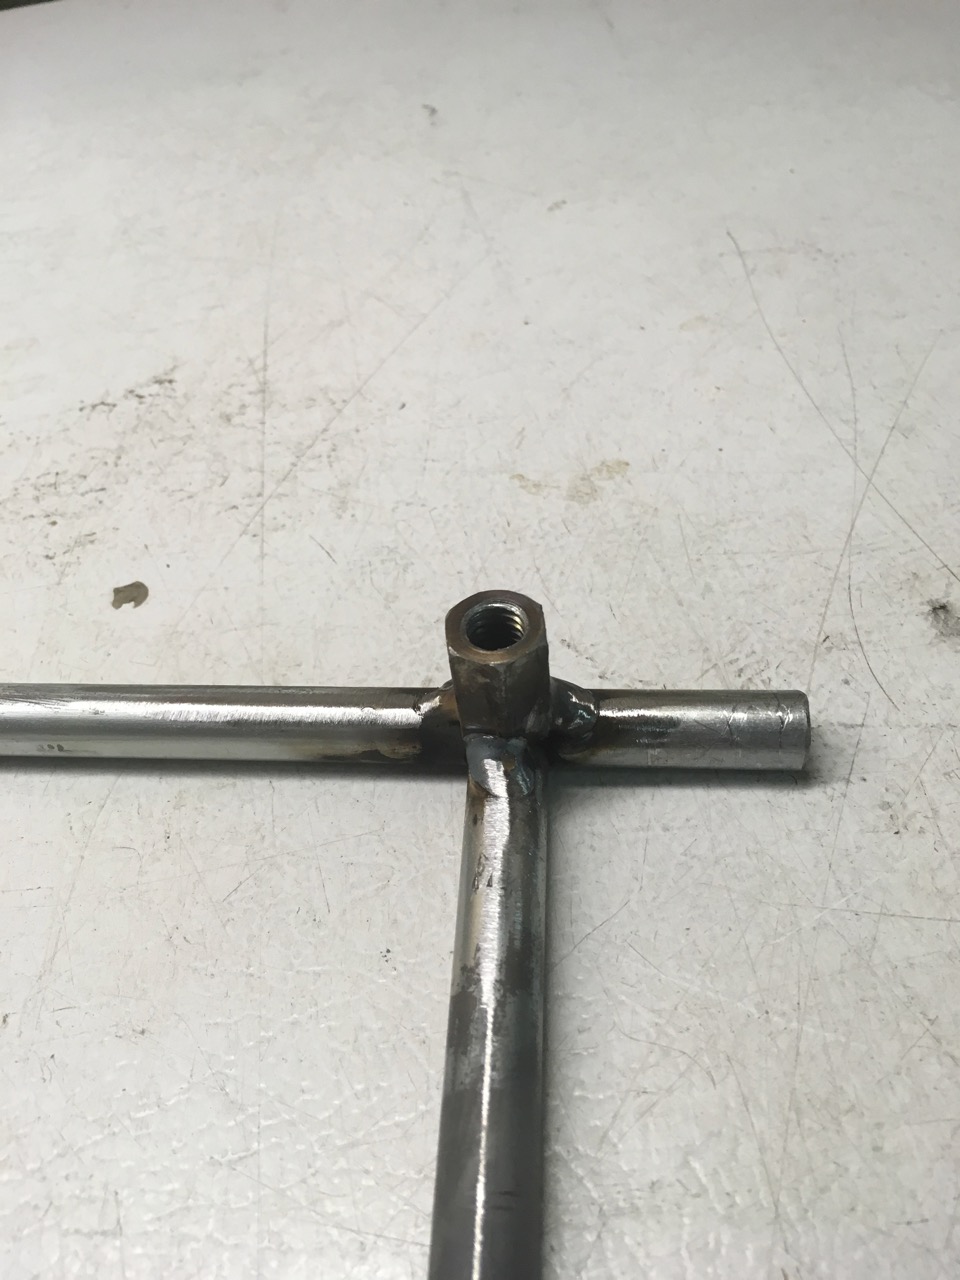
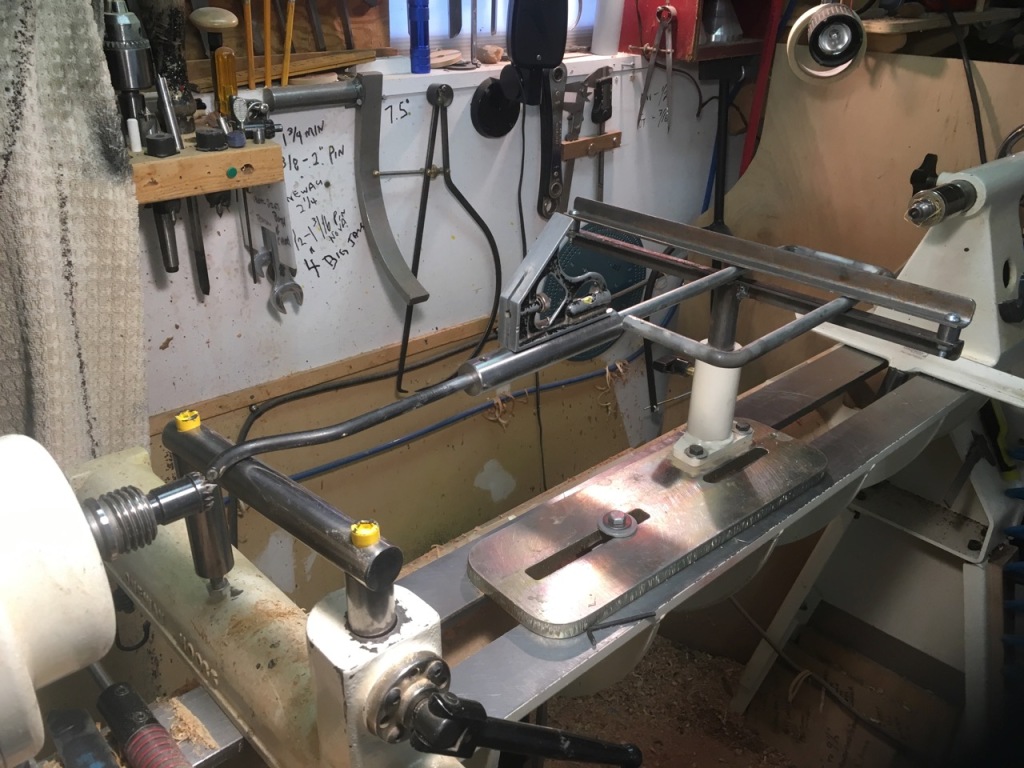
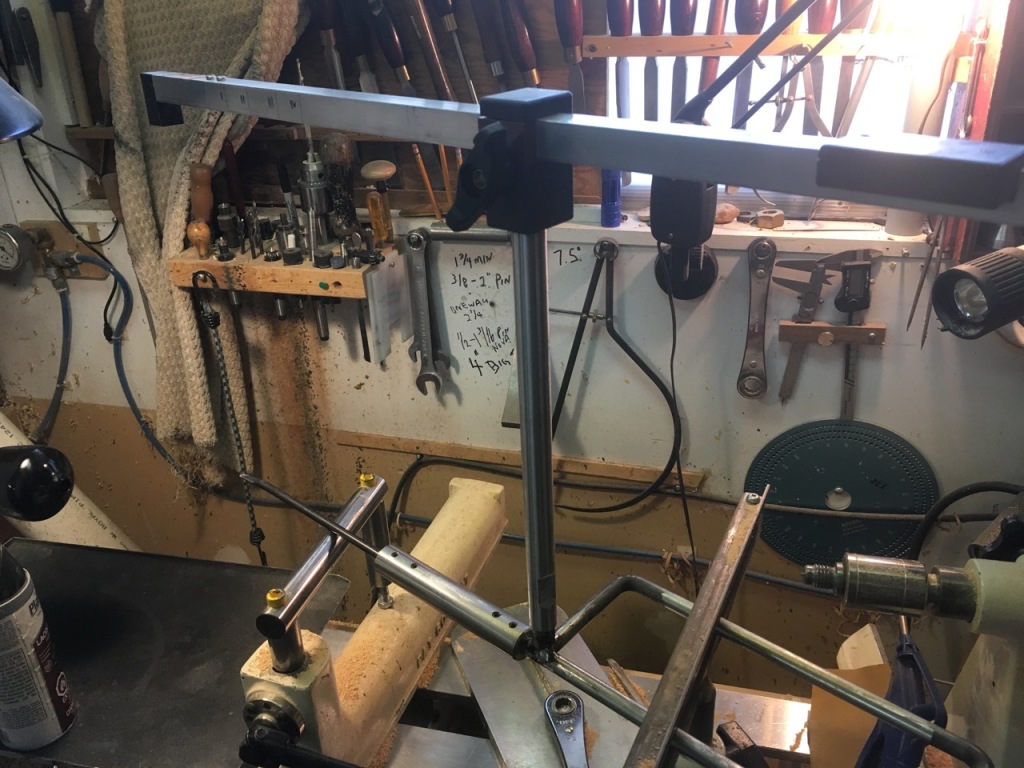
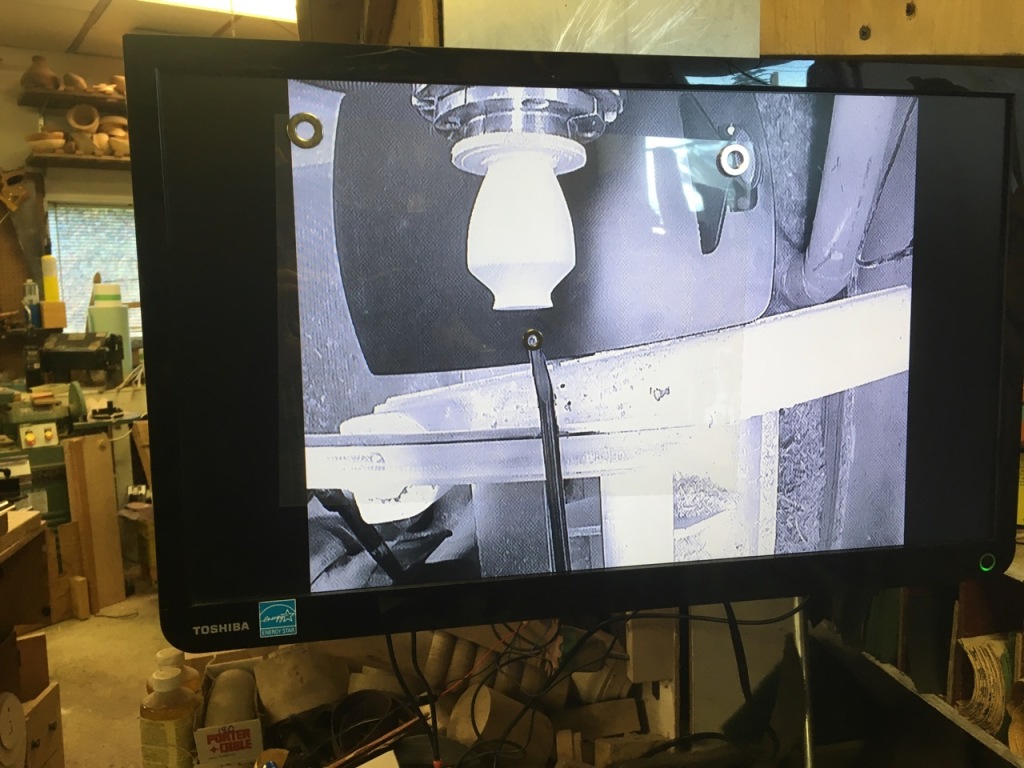
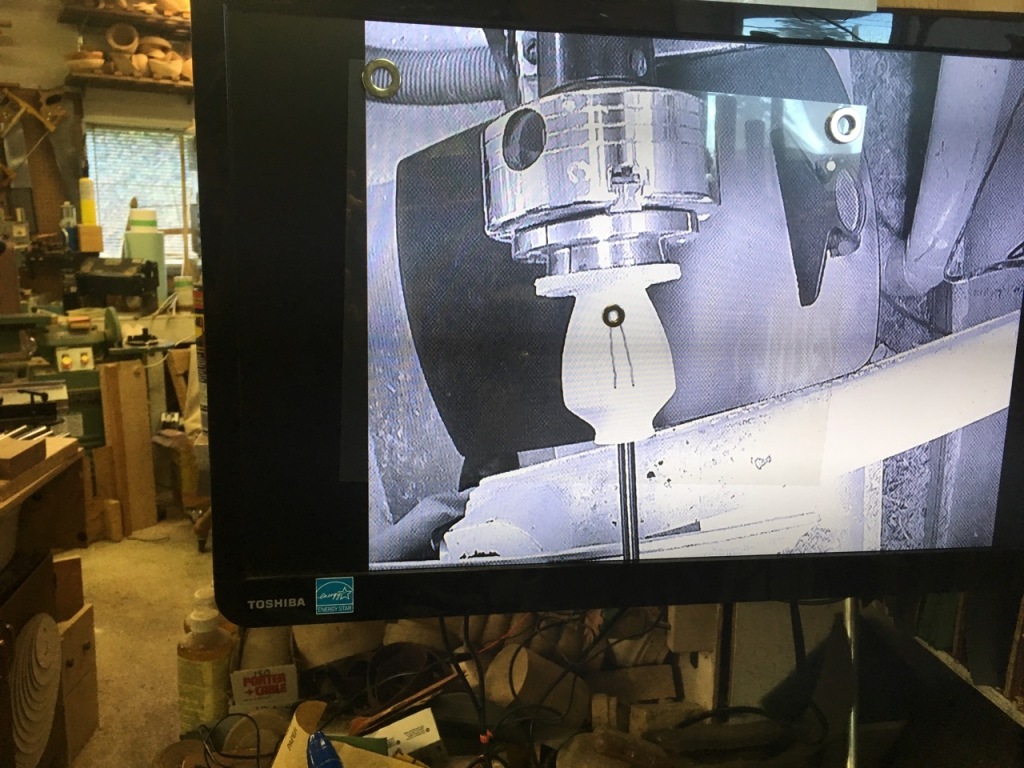
It worked really good but I soon realized that the continual stopping to test wall thickness and starting again was as pain and I needed to add either or both my laser and camera set up. To allow this I found in my stock a 3/8″ joiner nut which I cut in half then faced off with my metal lathe. I took it to the local Machine shop and paid the grand sum of $5.00 ( no receipt of course) for them to weld it to my rig. This is the same thread as is on the post that holds my laser and video camera.
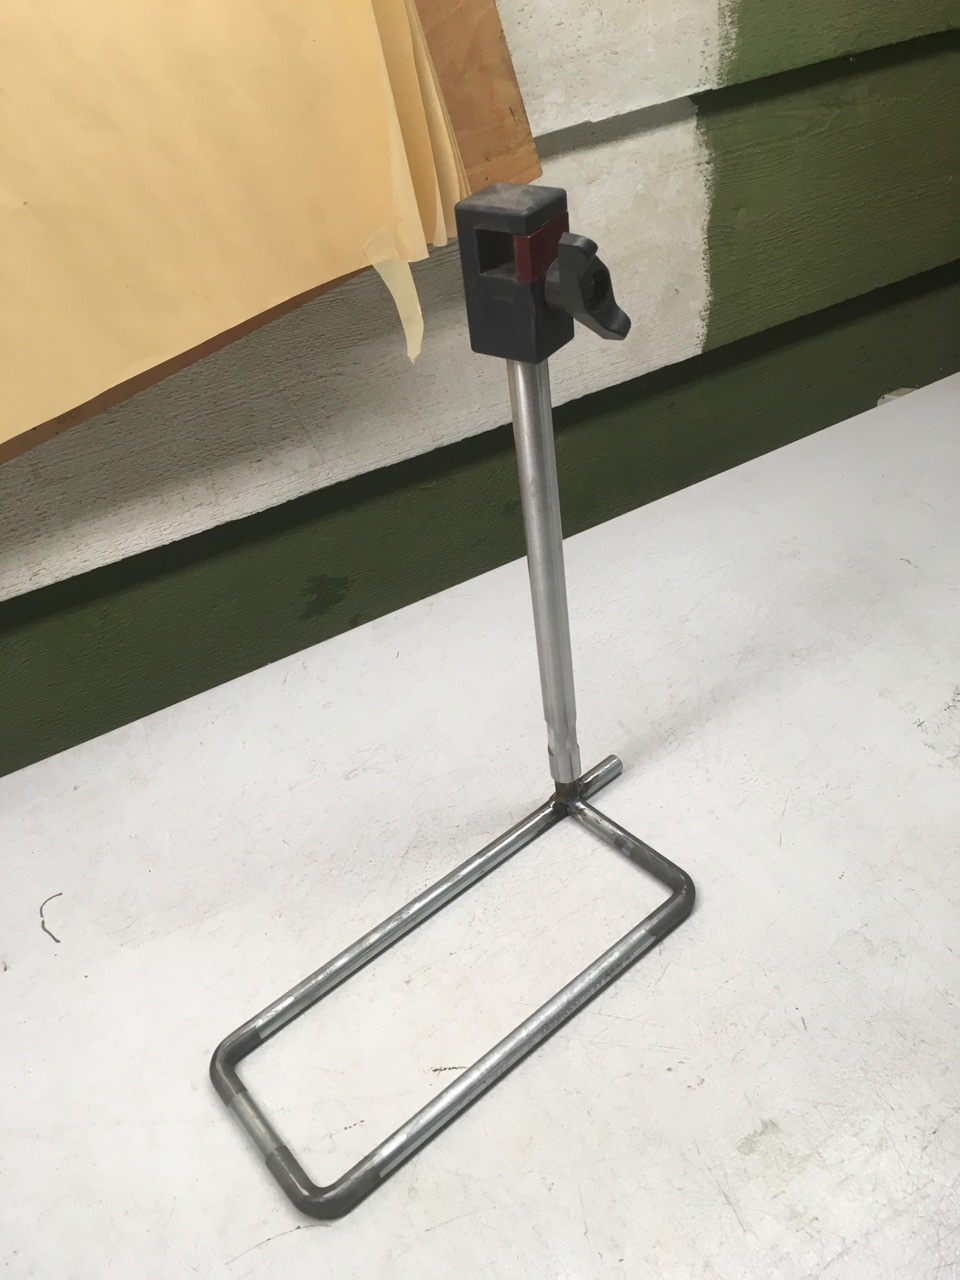
Here’s what the setup looks like from a couple of angles and then with the laser and camera. It does appear overkill but you know what? I don’t care. I may make a new shorter support bar to get the laser and camera closer but for now I think I can work with it just fine.

Leave a comment