woodbowlsandthings

March 11, 2020

How long does it take you to make a ring?

Filed under: DIY ring, Finger rings, ring, ring core, ring liner, Tools, Wood Lathe — peteblair @ 2:07 pm

This question was asked of me the other day and I abruptly said 20 years of practice and experience. Of course in reality that is less than half the time I have spent building the skill set i have today .

Thinking back on this question I decided it might be interesting, even to me, to list the steps (with photos) and see just how much time it takes me today to make a ring.

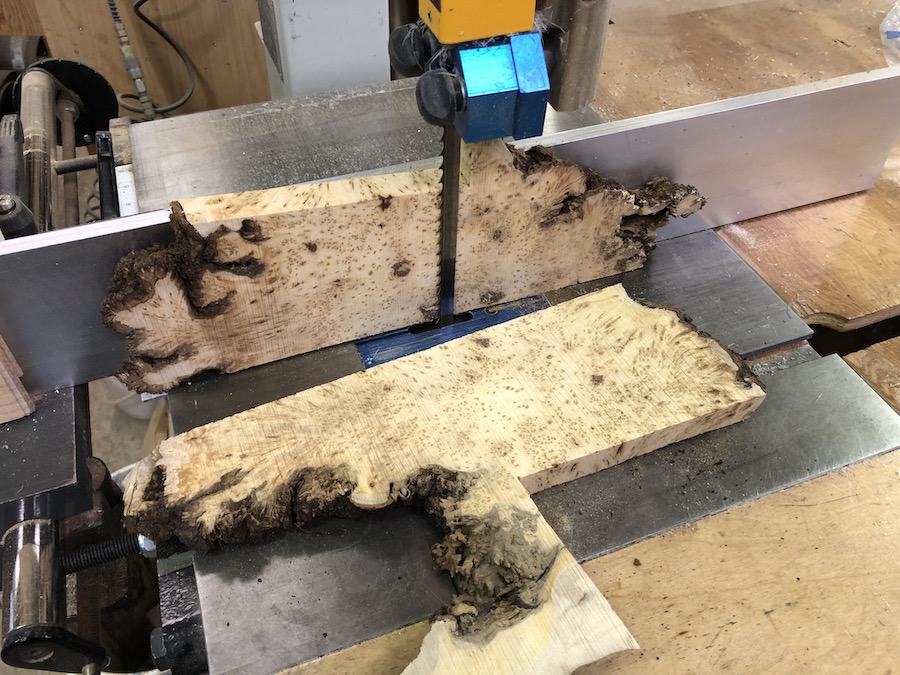
An issue of course is what ring construction should I follow? I make many types of rings but one of my favourites is a yellow Cedar Burl with a clear or coloured liner. Lets follow the process for that ring. Below is a photo of the larger of the pieces of Yellow Cedar burl I was given. It does take some effort and a good pressure washer to get most of the bark and dirt out of the nooks and crannies!

Step 1: Finding a piece of this wood is like trying to find Hen’s Teeth! I’m lucky as I was given a nice piece from Vancouver Island. Here is a photo the small piece I have saved for something special. Time: unknown

Step 2: Determining how best to cut the burl to maximize the usage and get the most beautiful piece from it. Time: with a large burl to decide would likely take at least 30 min. Then I would probably have to make the first cuts with a chain saw so lets say a total of 1 hour.

Step 3: Slice a piece of the Burl with the bandsaw. Time 1 minute

Step 4: Drill ring blank with hole saw. Time 2 minutes

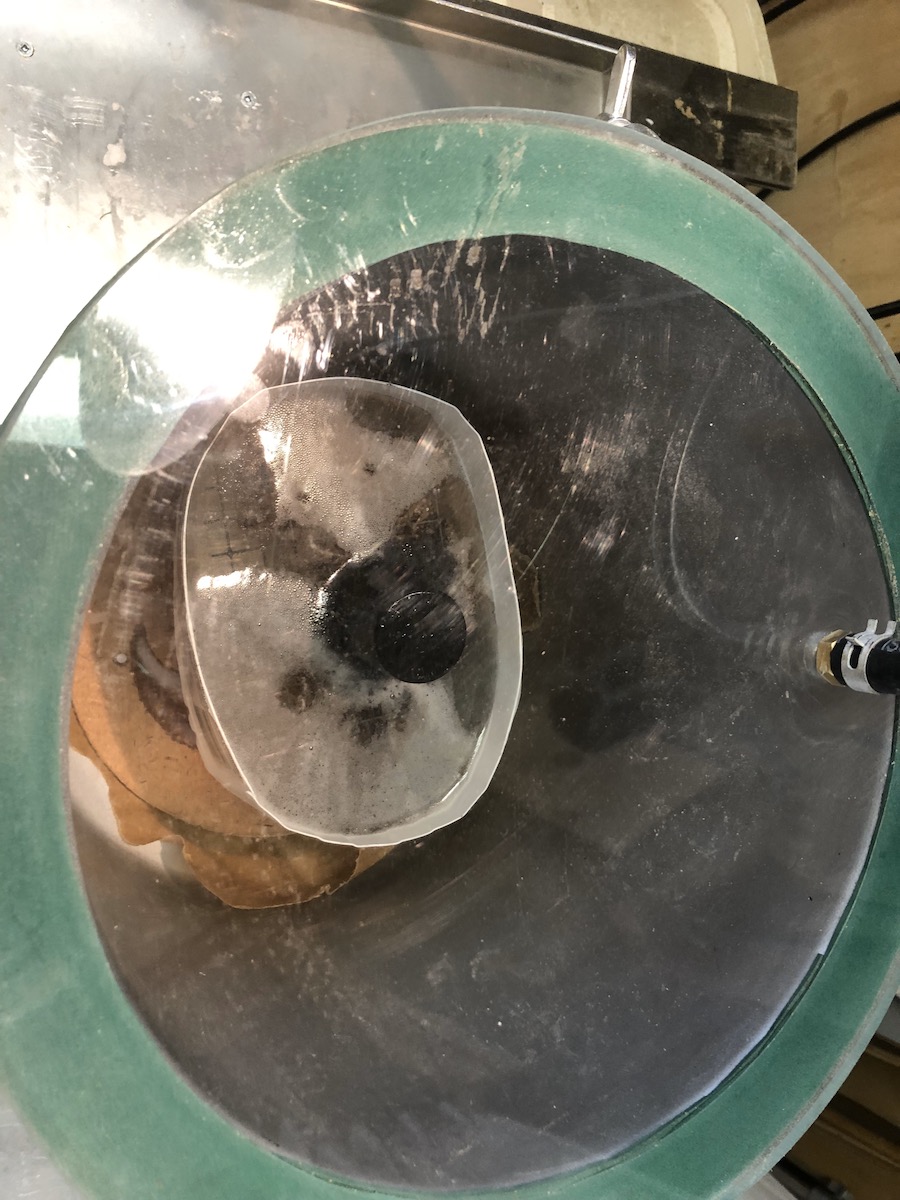
Step 5: Dry ring blank in Toaster Oven. Time 6 to 12 hours depending on how wet the burl is.

Step 6: Stabilize the ring blank in Cactus Juice in a vacuum pot. Time 30 minutes

Step 7: Bake the ring blank in in toaster Oven. Time 30 minutes

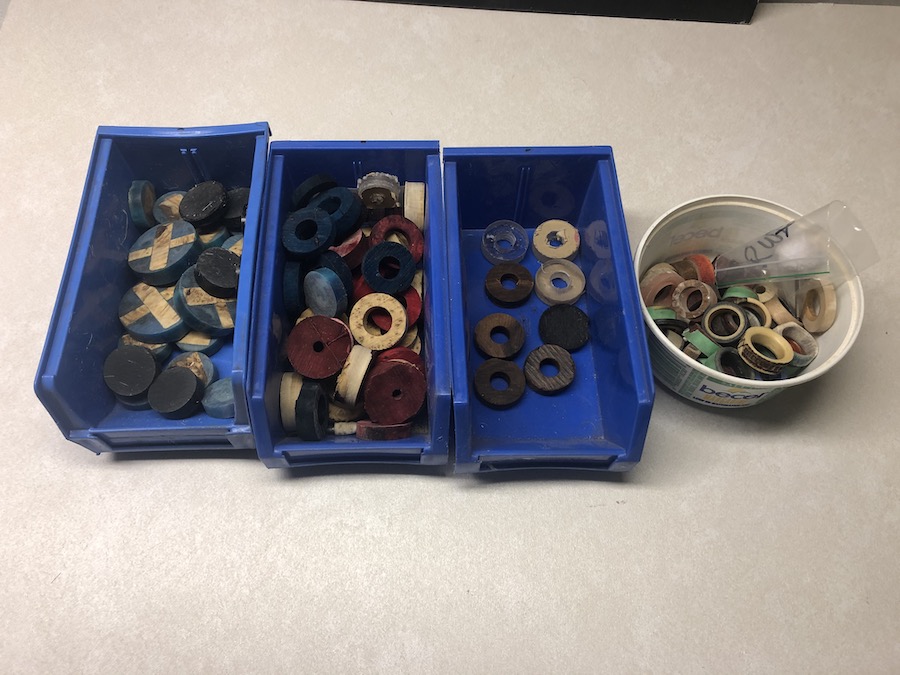
Step 8: Make liner. Time 10 minutes (to do this I must use just about all the steps to make a ring)

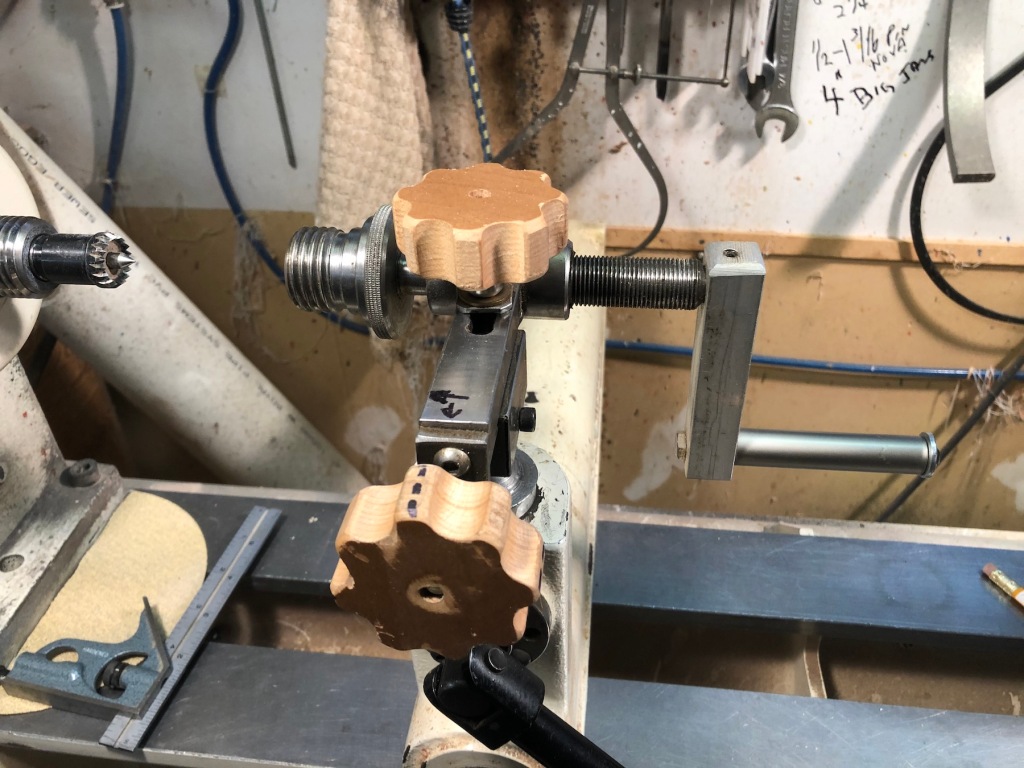
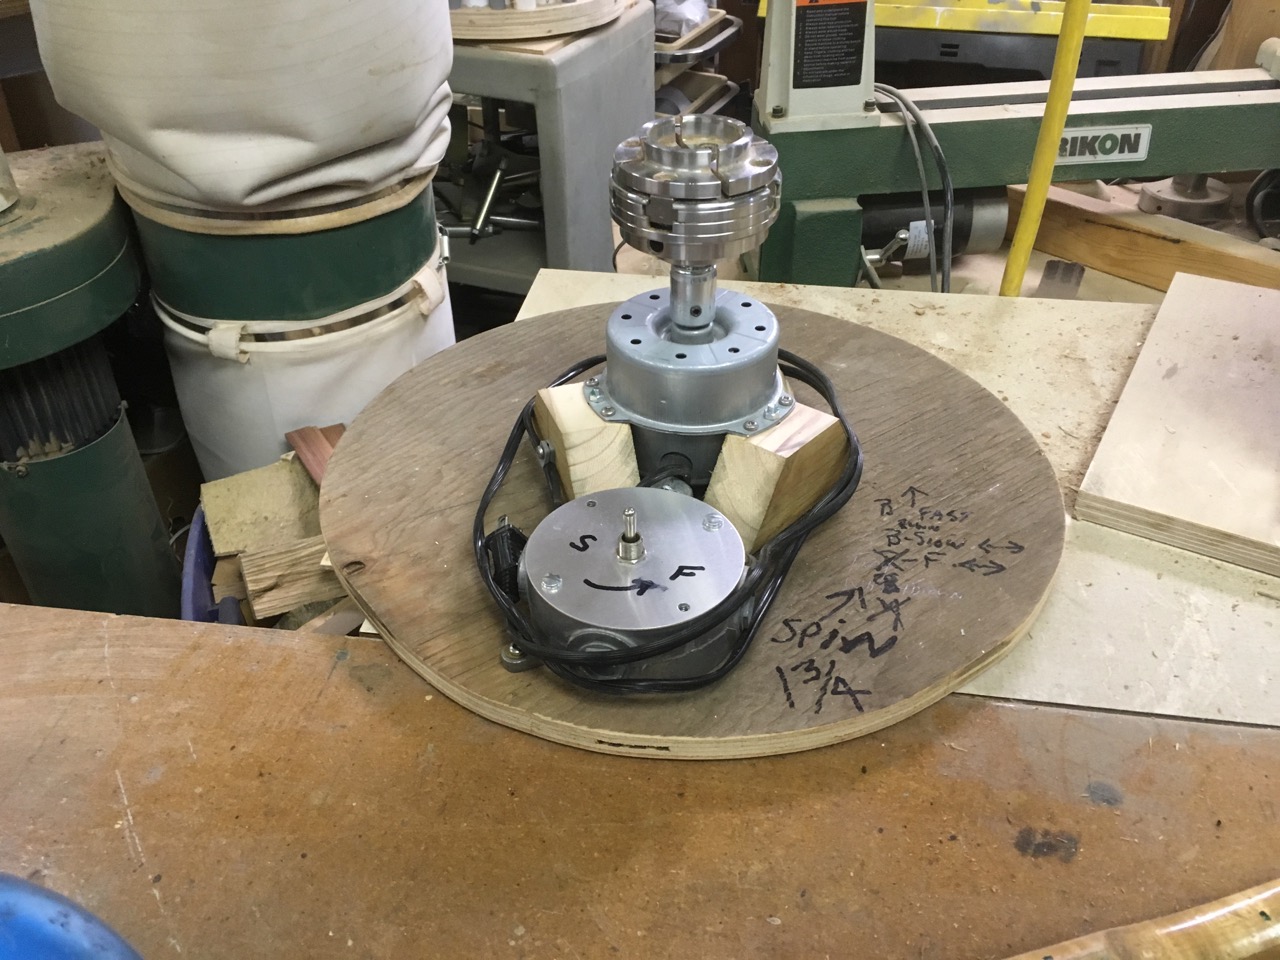
Step 9: Using jig in wood lathe, drill the blank close to ring size, must drill from both sides to minimize chipping out the back of the blank. Time 2 minutes

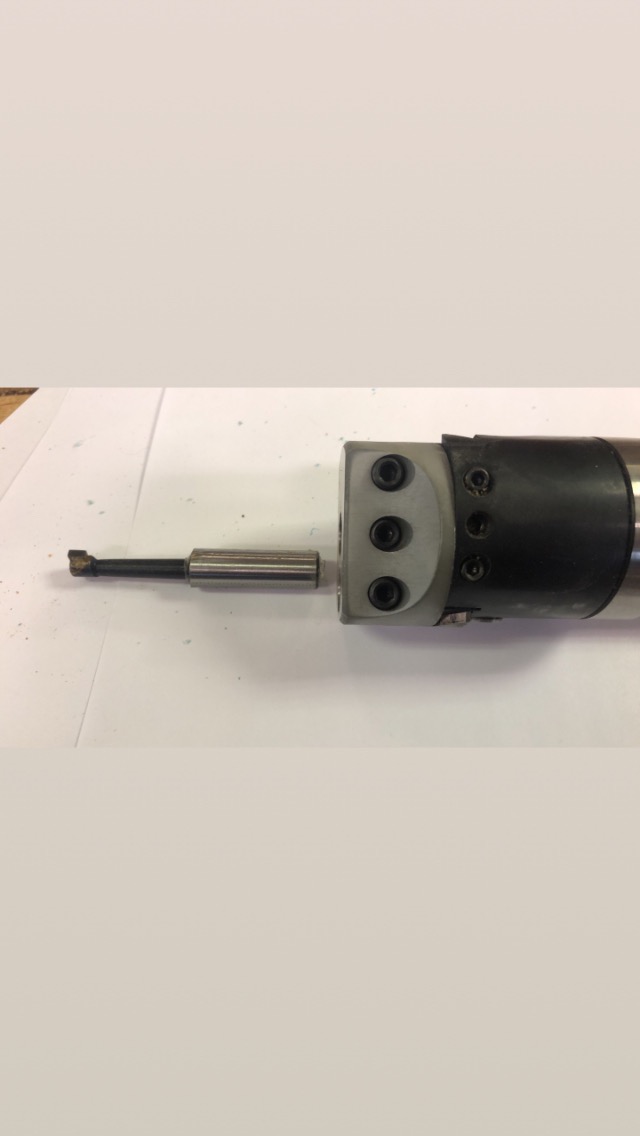
Step 10: Utilizing a boring head fit the inside of the blank to the ring liner. Time 2 minutes

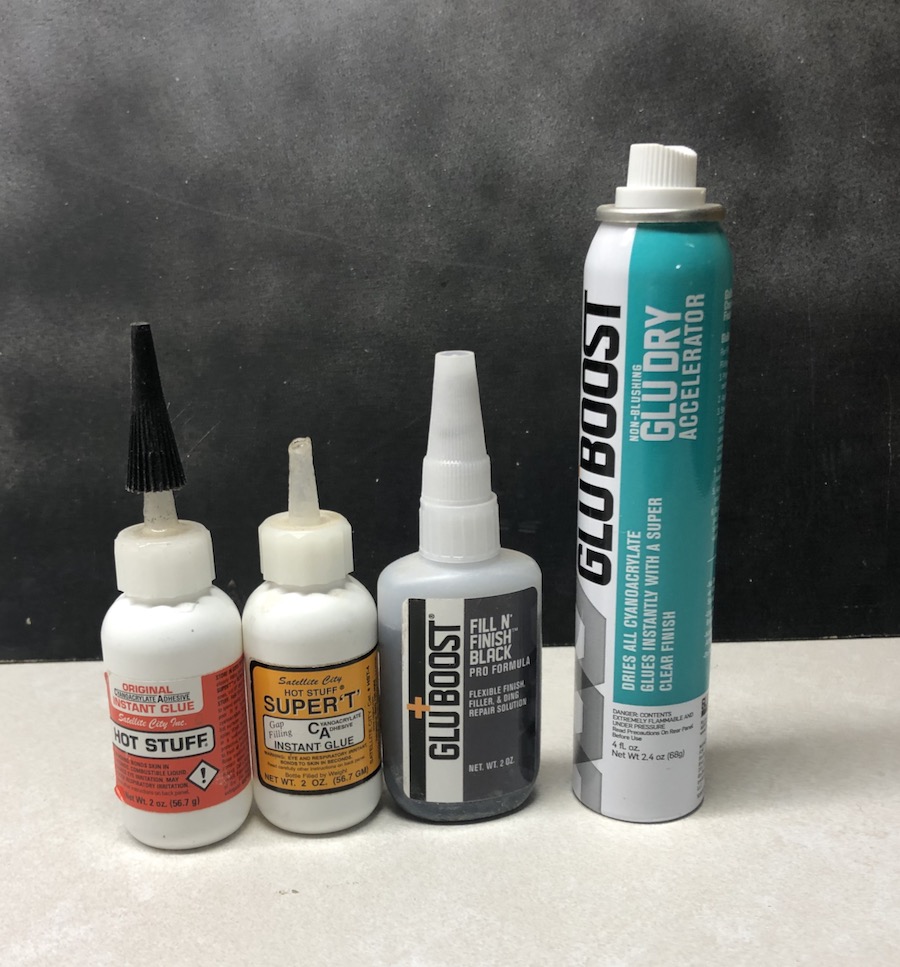
Step 11: Glue the liner into the ring blank. I use med CA Glue. Time 1 minute

Step 12: Return the ring to the jig on the lathe and turn to final width, finish the inside corners and sand inside ring and corners. This requires the ring to be turned once in the jig. Time 4 minutes

Step 13: Finish the inside and inside corners with thin CA glue. I usually do 3 coats per side. This again requires the ring to be turned once in the jig. Time 2 minutes.

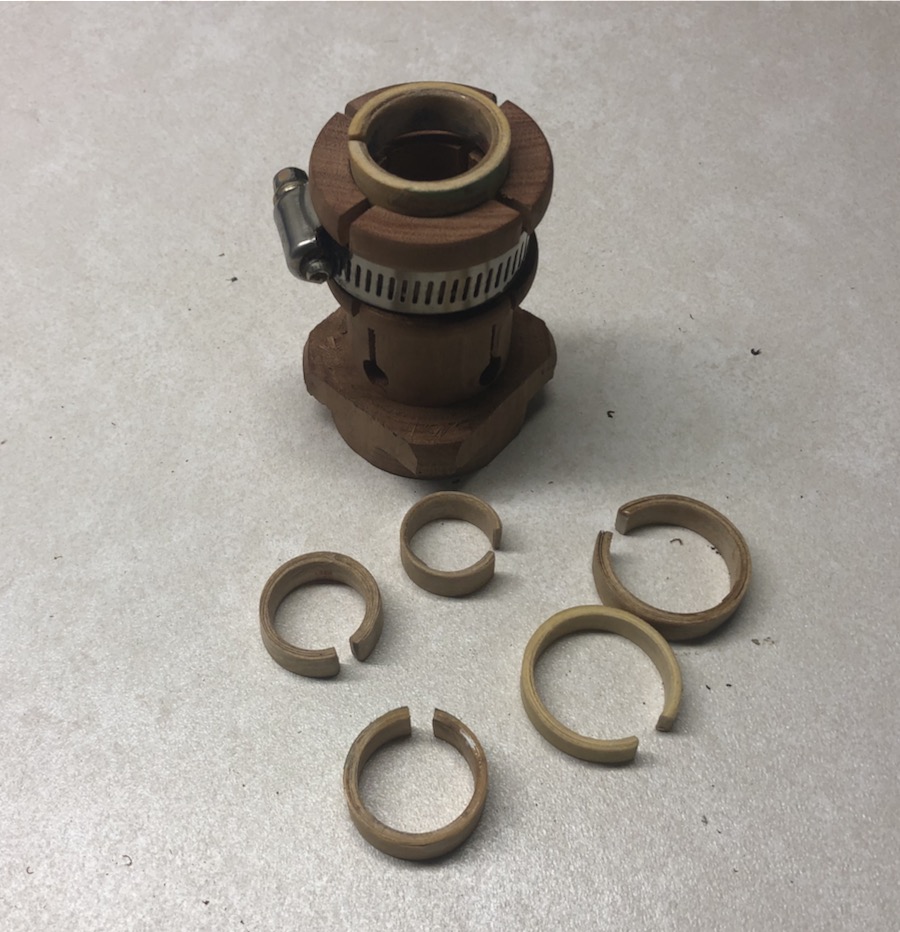
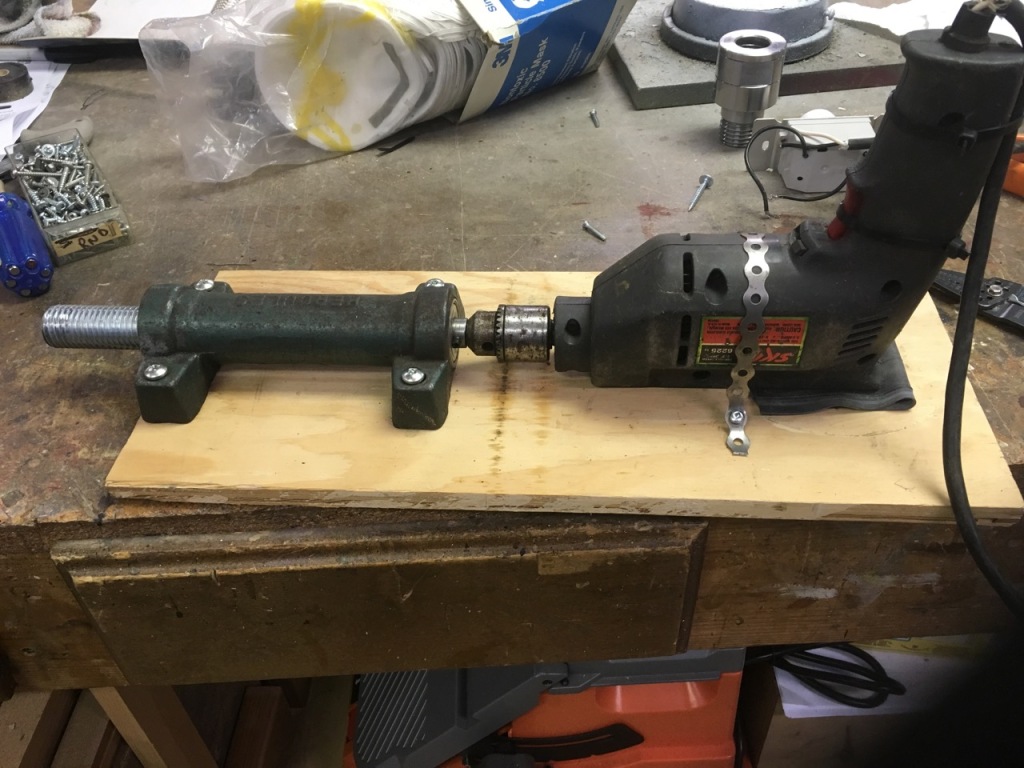
Step 14: Put ring on the home made ring mandrel to finish outside. Time 5 minutes.

Step 15: Apply thin CA glue to outside of ring (3 coats). Time 2 minutes

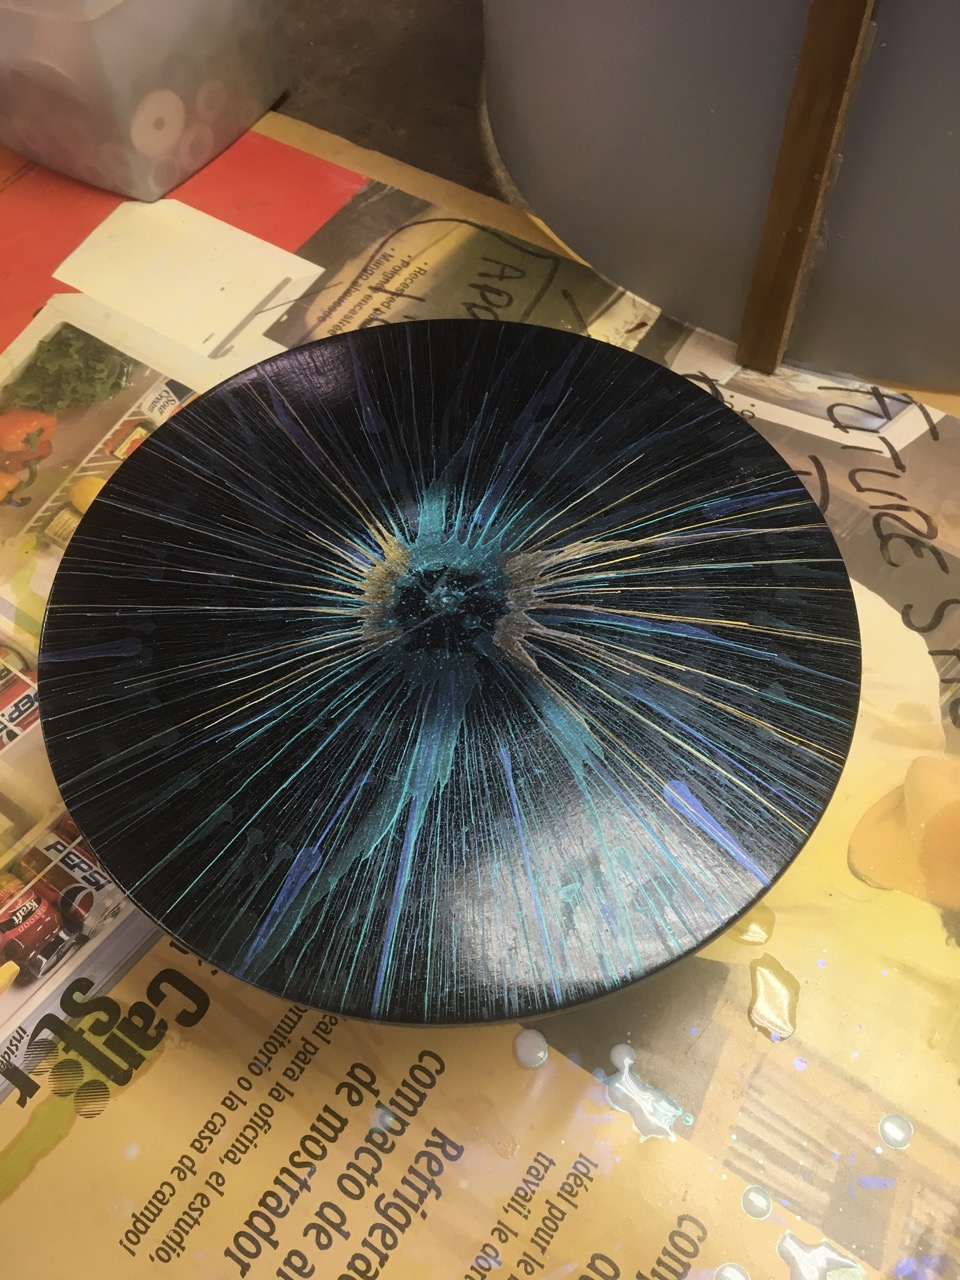
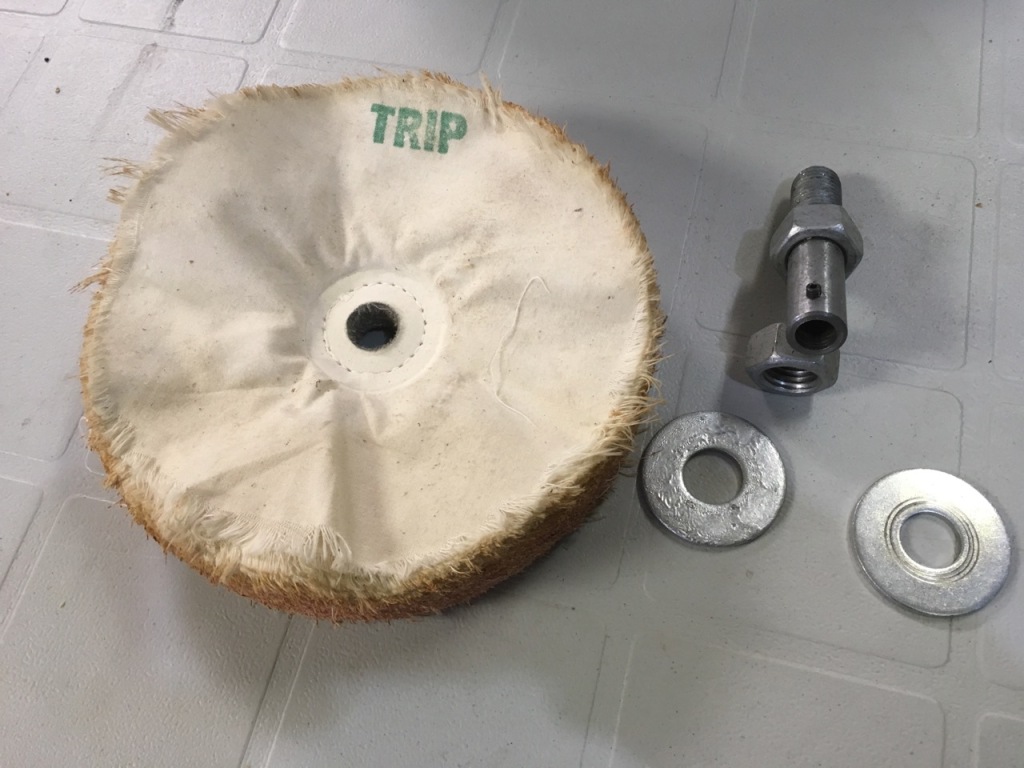
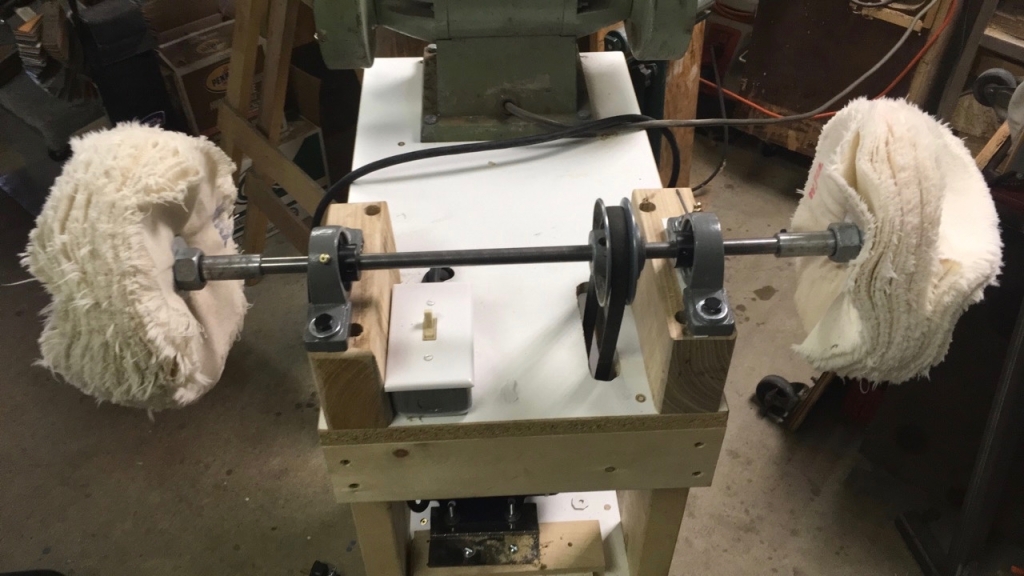
Step 16: Buff the ring, inside and out. Time 1 minute

Now thinking back on the original question I really can’t say actually how long it takes to make a ring and like most things that I enjoy doing I really don’t care!!

Hopefully you might find a snippet of information hidden in this text that might help you along the way to making finger rings.

February 22, 2020

DIY Tools For Ring Making

Filed under: DIY, Finger rings, mold, ring, ring core, ring liner, Tools, Wood Lathe — peteblair @ 8:03 am

Yesterday I wrote about making finger ring Cores and Liners and today I thought that there might be some people interested in the tools I use (mostly shop made) to make finger Rings.

I started out making rings from veneer and then thin strips of wood that I could plane myself. These are cool and can be dyed with interesting colors but I found them quite time consuming to make.

I have now moved onto solid wood, antler, resin and combinations of these.

I’m not going into detail on my stationary tools but I use a bandsaw, drill press, 6″ belt sander and of course my lathe in addition to the following . . .

I found I did need to buy a few things to get me going but if you are ingenious you could probably do with out these. I bought a set of ring sizers, a ring size measure tool and I find a Vernier Calliper indispensable. I already had most of the lathe tools I use.

Here we go in no particular order are the tools I use.

I often cast or turn cylinders to make rings from and I am aware that cutting round stock on a bandsaw can be very dangerous. Here’s a photo of a sled and stock holder I made to use, I have a couple sizes for different diameters of cylinders. With it I can safely cut a 7/8″ long round piece into two 3/8″  ring or core blanks. The “V” sled is great for cutting round stock until it gets too short to hold safely.

Here are the two Ring Tools I bought and a set of callipers that I use but already had around and the recent add-on of a boring head which makes sizing a snap. It is a big saver as well when I am boring wood or resin for a core. Designed to easily sneak up on the final size and keeps the hole square.

This is my latest additon an outside finishing mandrel, I have made a couple of different sized nylon holders for different size rings. I made them from an old cutting board and find that CA finish doesn’t seem to stick to them. It simply consists of a collet which is pretty cheap and draw bar with a billiard ball handle and a bolt that fits the mandrel. I did have to lengthen the threads on the bold but I think it is possible to find a bolt with enough threads to do the job.

Here are some prepared ring and core blanks. Wood solids, Cast Alumilite, cast combination of wood and Alumilite and some made from veneer and wood strips.

Here are my shop made inside sizing and finishing  jigs and a set of nylon jaws I made for my oneway stronghold chuck.

These adaptors are made from woodstrip rings and allow me to use the inside finishing jigs to hold many different sized rings at about any stage of production or even if an inside repair is needed.

This is the mandrel I originally made to finish the outside of rings but now I use it only to do the outside of liners and cores and use the outside mandrel with the nylon bushings to do all my finishing.

This is what I now use to cast Alumilite and Alumilite and wood blanks. They work great. I spray inside with a mold release before casting.

Here’s one I just cast.

Some of my wood strip stock as you can see some are already dyed.


I finish my rings with this buffer utilizing rouge, white, and carnauba wax. i seem to be able to polish both the outside and inside with these buffing wheels.

Here are my finishing materials. I usually apply 4 coats of CA. I use regular for finish and black and medium thickness to glue liners.

I have just added two negative rake scrapers that aid in squaring the outside of the cores, they work very well with resin, or wood as well as combinations of the two.

And a couple of shop made thin grooving tools to use when I want to add strips of material, small chain or what have you.

All my ring making pieces fit in this nice tub which I can then store out fo the way and bring out when I decide to make a ring. It’s nice to have everything in one place in my messy shop.

I hope this blog helps and maybe even gives a few of you some new ideas that will make your ring making easier and more fun.

February 19, 2020

DIY Finger Ring Cores or Liners

Filed under: Art, DIY, ring, ring core, ring liner, Wood Lathe — peteblair @ 3:14 pm

Searching the web the last few days I was unable to find any information as far as making my own ring cores or liners.

The main reason for my interest is that a while ago I cast some stabilized Yellow Cedar Burl and Alumilite to use for ring blanks but to my dismay I found the joint between the two materials was not solid and when clamped in the ring the jig to finish the outside the pressure just broke them into pieces.

I as a little frustrated and tossed them all in the garbage last week.

I am always thinking about stuff in my shop and it started to really bug me that I couldn’t use these blanks because I had put time and material into making them and I thought they would look great as rings. Sometime during the night I go the brilliant idea to add a core or liner of some more durable material. So I emptied the large garbage bag and retrieved about 12 blanks, not sure how many I had tossed out but it was dusty and dirty and I wasn’t even sure my idea would work.

I began by Googling “Ring Cores”, wow there are way too many to choose from and the really cool ones are quite pricey!

I must admit I am frugal (read cheap) and hate to spend any money that I don’t have to.

So today I started searching my shop for suitable material to use for ring cores.

I started out looking for suitable metal to use but soon decided that working metal to size rings likely wouldn’t be that much fun and working in my shop is all about having fun!

I found I have lots of clear acrylic and plexiglass left over from years of projects and thought that it must be a little stronger than the blanks I was trying to save so I began by drill a few 1/4″ thick pieces with a hole saw. You see I like to work from round sections when I make rings this allows me to go straight to my home made jigs and not have to mess with two sided tape etc.

I am presently searching for black or white Corian to use for this as well and I understand the Corian makes a nice ring all by it’s self.

Utilizing the tools I have already made to make rings was a top priority, and really all I was going to do was to make a very thin ring.


There is a ring core in there somewhere!

Following the usual steps in ring making I was able to make several acrylic ring cores of different sizes.

I recently added a Boring Head to my tool set and it is amazing how easy it makes it to fit the inside of the ring core to a finger size and to fit the core to the ring blank.

Once I had the inside done I  turned the outside as thin as I thought I could using a 3/8″ bowl gouge. My callipers indicated .45 when I stopped.

I then grabbed the once discarded ring blank and again using the boring head turned the inside so the ‘core’ would fit nice and tight. The boring head is a great way to get parallel sides for this procedure.

Next was to use medium CA to glue the two together.

Then back to the lathe where finished the inside and the inside corner to make the ring comfortable to wear.

Next I sanded (1000) and polished both the inside and both inside corners with a plastic auto polish designed for cleaning auto head light lenses. Works pretty slick.

Then to the outside. Here is where the original ring blanks failed and I was a little nervous at this stage but with gentle pressure all seemed fine.

I finished to outside dimensions with a nice sharp 3/8″ bowl gouge, rounded the outer corners and then polished the outside using the same procedure as the inside.

All that was left was a light polish with my Beal Buffing System and they are wearable.

I guess I did alright as my wife has already commandeered the second one I made!

If you have any questions please feel free to leave me a note or contact me directly on Facebook I think I can be found by searching Peter Blair?


PS as you can see I again forgot to take photos of all the steps and have had to add a few photos from previous ring builds . . . .

December 10, 2019

Threadin Jig improvements

Filed under: Wood Lathe — peteblair @ 7:18 am

Wow it’s been so long since I last wrote a blog I’m not even sure I can remember what to do.
Lately for some reason I have been inspired to return to a couple of tools that have sat idle for a few years in my shop.
My threading jig and router Incising setup.

Yesterday hauled out the Threading Jig, dusted it off and threaded a small maple burl box and wanted to share the improvements I made to this Jig. I bought is about 10 years ago and now I believe it is much improved and sold here in NA. When I purchased mine it was from England and the shipping cost just about convinced me not to buy. It did have some issues when it got here such as the threaded section that goes into the chuck was not threaded properly and wouldn’t fit but they sent me a replacement for no charge.

Ok so mine came with a small know that was used to rotate the piece into the spinning cutter. I quickly removed that and added a large handle that allows me a lot more control. You can see it on the right side of the jig.

I would like to add that the machine of the slide leaves a little to be desired and was difficult to tighten using a small allen key. The two wood knobs were added to provide me with more leverage and a quicker way to tighten the slide. I also marked the front one so I could go easily see how far I had advanced the piece into the cutter. I have found that every time I advance the piece I had to tighten the bold locking the slide or I get a bit of wobble. I do think that these issues have now been resolved and I think this is now made my Chefware or ???.

One of the issues that always plagued me was setting the jig up square and added to that the difficulty in testing the fit of the threaded part. It’s easy to square the Tool Post with a square but I can’ find a way to align the rotating section to the ways and of course it cuts better threads when aligned. One of the beauties of this jig is that it is easy to swing it either way to then test the male or female parts but it was most difficult to return it to it’s original position with out a lot of eyeballing the jig on my ways. Yesterday I decide, after using it that it would not be that difficult to add a small pointer which would aid in the repositioning of the jig after testing. MY set up is easy now and here is the result of my efforts.

Now it is quite easy to eyeball the small pointer to the fine line I scratched on my tool post.

I hope this post helps you decide if you could use a Threading Jig and provides you with some ideas to make it better.

ps. I have not checked available Threading Jigs to see if any or all now provide these improvements.

I would like to add that this type of jig allows threads to be added to most woods however it is still a good idea to harden the threads or the area to be threaded with wood harder or CA glue.

August 9, 2018

Paint or Dirty Paint Pours on wood turnings

Filed under: Wood Lathe — peteblair @ 2:02 pm

Have you ever taken you time and finished a piece and no matter what you did it just was an ordinary turning not the ‘special’ piece you had planned? If so you might consider a paint or ‘dirty paint’ pour. I had spent many hours on two pieces that I had dyed blue, one a hollow form and the other a cup shape but even with the dye I just wasn’t happy.

Enter the paint pour. Dirty paint pours are all over the internet and social media and I am always looking for something new to try. I googled Dirty Paint Pour and got a load of hits. I watched a few, especially if they were pours on wood. Mostly the Dirty Pours are on a flat pieces of art canvas or occasionally on a round slightly convex wood turning. I think the one I enjoyed the most was from a well known kilted wood turner, Ronald G. Campbell. After watching some of his videos I thought I would give it a try.

Before I was willing to try it on the blue pieces I thought I had better do some experimenting on a few other unfinished pieces I already had in my shop.

I decided that if I wanted to do a hollow form or cup shape I might need to do it a little differently than the inverted cup or colander method. The cup shape I had would not allow me to invert a cup of paint on it unless I was to do it from the bottom up and for some reason I just feel that the paint should run down the piece not up it. This may or may not be the best way, you be the judge.

The wood should be finished with a sealer or finish prior to beginning or the base coat will soak into the wood and prevent an nice pour, don’t ask me how I know this.

First for the hollow form, I started out making a sort of colander from a small plastic cup that would sit over the opening in the hollow form. I heated a small awl and made small holes around the base of the cup. I have found in some instances the holes work better around the perimeter of the base actually in the bottom instead of the sides. I use both styles.

I knew that if I poured paint into this cup while it sat on top of the form it would likely slide around and possibly even fall off. My solution was to hot glue a short section of dowel that fit into the opening of the hollow form onto the bottom of the cup. It can be seen as the light coloured section in the center of the cup. I soon discovered that this also allows me to rotate the cup to assist in placing the paint. I sometimes just put drops of paint into the cup after the initial pour to add color, variety or detail to specific areas.

I love to work with Jo Sonia acrylic iridescent paint and decided this was what I wanted to use. Knowing that these paints look their best on dark or black surfaces I began with black and dark colors as the base coat. The piece below is coated with a wet base coat and is ready to have paint poured or placed into the cup.

The small cups let me place paint in any area I want and to watch the result and make adjustments as the paint flows through the holes in the cup and down the sides of the piece.

After the paint has dried for several days I wet sand with 800 grit and apply about 10 coats of spray on Lacquer. This is then sanded back and the process is repeated several times. The high gloss finish is then buffed to get an even more glass like finish. I was shooting for a piece that looks like fired glass or porcelain.

For the cup shape I turn a plug for the top of the cup that fits flush to the edge and is sort of tapered from the top down to let the paint flow. I use the inverted cup method for this but find it a little less controllable and much prefer to do hollow forms. I did find a small screw in the top made removal of the top easier to do before the paint hardens and makes it a permanent top.

Above, paint has been poured into the cup in layers. The cup and lid are inverted and the cup of mixed paint is placed against the top and then all the pieces are inverted. The cup is then lifted allowing the paint to flow down the form.

I have experimented with other acrylic colors and find that they just don’t seem to retain their color and randomness when they are dry. I do admit however that they are fun to do and exciting to see the paint flow.

Paint mixing – There are many ways to mix and apply paint. I like to mix the iridescent paint with water and acrylic base paints with water and Flotrol or any other medium that slows the drying process. I usually mix the base coat to a light cream consistency. It’s painted onto the piece and the the other paint is allowed to flow into and onto it. Silicone can be added to any of the top paint to allow them to form ‘cells’. I bought a tin of spray silicone and sprayed it into a cup from which I poured the silicone into a dropper bottle to allow me to accurately add it to the paint. I find that this process is hit or miss with me, sometimes it seems to help separate the paint into cells and other times not so much. I also on occasion briefly pass a propane torch over the surface which seems to help add cells. Another tip is that once I am happy with the paint flow I can slow or stop it by the use of a hot air gun held at a distance so as not to spread the paint. I believe this helps me ‘set’ the paint.

Here are some in progress shots of my favourite pieces. These are all at the wet paint stage.

The ‘cells’ are really visible in the above photo.

I did also try a pour and then blew the paint around with an airbrush for a much different look. The air brush tends to blend the paint. I’m not fond of this one but some of my friends and family love it. There is obviously lots more experimenting to do.

Until you try a pour, whatever method you decide, you can’t fully imagine the fun it is!! It can be a little dirty so grab a pair of


Give it a try and don’t hesitate to email me for more information of just to share photos of your work.


June 1, 2018

String Pull Painting

Filed under: Wood Lathe — peteblair @ 4:37 pm

I have begun a foray into String Pull Painting. After seeing a few videos on Utube I thought I would like to try this process on some of my wood turnings.
After some or should I say lots of experimenting I have been able to add this style of painting to a few of my pieces.
I did a couple of monochrome and one on clear coated Silver Maple. None of these pieces of Silver Maple had much character and by adding some paint I think they are now something anyone would want to own and display in their home.
I started out thinking I had to trap the string between the object I wanted to paint and some sort of flexible pad. At that time I was trying to paint multiple colors at once as well but have since decided that by the time I get the string ready I have lost the effect. But I will still pursue this because I am intrigued by the second photo below.

Next I watched more video and found one where the string was just set on the wooden object and pulled without being trapped. This process seemed to me to be much more ‘user friendly’. Bending a pad around a turned object to trap the string was not an easy task. I did try to use some foam sheets and you can see the results above.
I have probably pulled 50 strings on various turned pieces over the last few days and have only 11 ‘flowers’ that I felt were successful.
Thankfully acrylic paint is fairly cheap and easy to remove if washed promptly with water. In some instances I waited too long and had to sand the paint off with fine sandpaper or a fine abrasive pad. In these cases I was forced to refinish the item either by applying more lacquer or spaying on another coat of paint.
I have tried painting over a fine sanded surface (1000 grit), straight on a painted surface and on top of several coats of lacquer. If you decide to try this technique I would recommend that you have 5 or more coats of finish sanded between coats to keep the surface fairly flat this will allow you to sand off the ‘oops’ without going through the finish. Be sure to allow whatever finish you choose to fully dry or the acrylic paint will be very hard to remove.

So many variables!

– SURFACE PREPARATION: this seems to make a difference in how the sting slides or doesn’t slide and also in how much paint is left behind. I would imagine that temperature, humidity etc. might also impact the technique.

– PAINT: I am using cheap acrylic paint. I find it a little thick from the container but found when thinned with a little water and then mixed about 3 parts paint to 1 part Flotrol  works good for me. The final thickness of the paint is going to impact the work depending of course on the string as well.

– STRING: this is a very interesting aspect. I read where people use thread, string, wool, chain etc etc. Most of my work is on the smaller side and what is needed for this is a material which when loaded with paint bends easily so it can be placed where you want it to go and not where it decides to go. The work I show here was done primarily with a single strand from a string of what I think is cotton. I did try cotton thread but found the paint tended to ‘bead’ along it’s length and I had trouble controlling the amount of paint but I intend to see if I can find a bit larger cotton thread. Cotton seems to be more easily positioned.

-OTHER ITEMS: I tried a few different sizes of small chain without success but it may be something you might like to try.

I usually place a small plate under my turning which is mounted in some manner on the lathe. You might notice that I have a tray under the work to minimize water getting on th lathe ways and I have also added a slide-on extension table the can be positioned along the ways to give me more ‘table’ space.

Using my lathe to hold the piece allows me to lock the spindle and thus have the piece held firmly so it can’t rotate while I apply this technique. I put the mixed paint onto the plate and lower the ‘string’ into the paint. I have found that when lifted the first time there may be voids so I lift it and gently run it between my gloved fingers to evenly spread the paint. I usually dip it twice but at this point I found that there is wayyyy too much paint on the string and this make a really dark ‘flower’ without much detail so I very gently draw it through my fingers again before placing it on the piece. It’s easy to remove too much paint which leaves what I deem too faint a ‘flower’.

The string is placed across the piece starting at the top and weaving to the center of the bottom. At this point I like to try to ensure the string is touching the piece along its entire length. I will tap or press it lightly with a mixing stick or other small item to make sure it contacts the piece over it’s entire length. This seems to help make a more defined ‘flower’. The string is then held by gentle finger pressure at the bottom of the item to ensure it gets pulled off the piece in the same location or there will be a wide band of paint at the bottom. I found that if I was able to add a bit of wood at the end of the piece (see photo below) and hold the string away from the base of my piece, I minimize paint blobbing at the end of the base. I did also find I could very gently wet sand the base (with 1000 grit) to tidy it up a bit and when the final finish is applied the sanded area blended well into the rest of the piece.

I found it really easy to overdo the effect and place too many ‘flower’ on a piece especially when the piece is of a smaller nature.

Here is a progress photo of the piece that was left natural with a green/black flower which I highlighted with a little pink after I took the photo.

If you decide to try this technique I have a few suggestions:

  1. Don’t be afraid to remove/wash off what you don’t like and don’t get frustrated if you don’t get what you consider a good ‘flower’ the first few tries.
  2. Leave a small, smaller than the base, tenon on the piece. This tenon will allow you put it back on the lathe if you need to re-sand and refinish the piece AND it is a good place to hold the string when pulling to keep paint blobs off the bottom of the piece.
  3. Experiment with the paint and string to find what works best for you.
  4. Don’t limit yourself to anything you see here or elsewhere experiment and be prepared to fail. I often try different techniques on paper first to see what effect I might wind up with.
  5. Have all your supplies ready and handy. Lots of paper towels, water and string to try.
  6. Have FUN!!!

May 3, 2018

Carbide cutters

Filed under: Wood Lathe — peteblair @ 4:46 pm

I am now part of the EZCarbide family, selling to turners on the west coast of Canada.
If you have ever wondered if going the Carbide route is for you here is your opportunity to give it a try.
Check out these sites:
https://www.facebook.com/ronald.g.campbell

home


Pricing here is in US $$ and is way better through me than if you buy direct.
Contact me for details.
peterblair@me.com

February 13, 2018

Colouring Wood

Filed under: Art, Silver Maple, Wood Lathe — Tags: , , , , , , , — peteblair @ 12:41 pm

I know it’s probably been done to death but here is how I add color and pop to some of my wood turning.
I first start by turning to shape and sanding to about 220.

This piece is destined to have some sort of blow paint applied after the dye and then a shallow bowl turned in the center. I want a dark green for this piece.

Next I apply black Leather Dye.

Once this is dry I then sand it back quite aggressively with 220 grit.

At this point the piece could be complete. Ed Pretty from my Guild has finished at this stage and the piece was wonderful. I plan to go further and on this piece I wanted a little more black so another coat of the Leather Dye.

This is again aggressively sanded back.

I like this better and stopped  here. While most people seem at this point to go with the darker color I sometimes go light first and then the dark. In this case, Yellow and then Blue for the dark green I’m after.

Sanded back again but less aggressively leaving quite a lot of the yellow showing. I then applied the dark blue dye.

Doesn’t look like too much here but after a very light sanding with 400 here is what I have. A Hair dryer is sometimes used at various stages to hurry the project along.

A couple of coats of sanding sealer with light sanding in between.

Then on to my finishing turntable and a few coats of clear lacquer.

Now all it needs is the blow paint. I’m thinking gold iridescent but I might add a little yellow. Sorry no finished piece yet because I am in Hawaii and this piece will have to wait another week or so for me to get to it. I’ll add photos of the finished piece as soon as I have it done.

February 6, 2018

Horizontal spinner for wood art

Filed under: Art, Silver Maple, Tools, Wood Lathe — Tags: , , , , , , , , , — peteblair @ 7:04 pm

Ok, starting over, yesterday I  began this blog and something went wrong I lost the last half of my text and all my photos . . . . . . .

Greetings again from Kauai. Today we did manage to see and sit in the sun for about 2 hours, now that’s progress.

Wow, two blogs in two days (or three now) I often don’t do two in a year!

Killing time during another rain storm and waiting for spuds to cook on the BBQ.

Todays topic has been rattling around in my head for more than a year. Some time ago I decided I wanted to be able to mount finished or partially finished items on a horizontal speed controlled turntable. This I felt would allow me to add color in a more controlled manner than when I do this on the lathe with the wood vertical. I wanted a device that would spin horizontally, be easy to adjust it’s spin speed, be reversible, be cheap and dependable. This is a photo of my first attempt. I’m utilizing a small chuck I use on my mini because it is easy to get threads to match from readily available bolts and threaded rod not like the M33 on my oneway.

IMG_3844

I started out thinking that I could use a fan motor and have collected a number of them over time but it soon became apparent that they were not as powerful or controllable as I wanted, primarily because they are not ‘brush’ type motors. I then switched my focus to an overhead fan. Knowing that people remove and replace them occasionally I advertised locally for a free used one but had no luck. There were a few that came available for a small cash outlay but being the cheap guy I am I stuck to my guns and decided not to pay for something I wasn’t certain would work for me.

In the end this all worked out for the best. I am known to peruse and buy on line from several local auctions and wound up with a “tool lot” that had an old beat up cord shredded 1/2″ drill. Ok, this should work fine, it was cheap, easy to control speed (brush type motor), reversible and top speed was about 1000 rpm.

I changed my mind about mounting the a lathe chuck directly on a motor as I did with the fan motors and instead decided to use an old Pillow block I had laying around. I took a section of 1″ 8 TPI threaded rod and turned it to fit thought the bearings of the pillow block on my small metal lathe. I turned a short section on one end to 1/2″ so it would be easily gripped by the drill. I then mounted it to a section of plywood and discovered that with a small piece of rubber under the drill it lined up perfectly with the 1/2″ end of the shaft. As can be seen below this tool will now function as a lathe as well should I want to spin wood while finishing it or ????

By mounting it on the edge of my heavy bench I thought it just might be able to take the shake it might get if the turned piece wasn’t quite balanced. Much to my surprise it spins with hardly a shake.

For now I am just clamping it to the work bench but soon will add some sort of fastening system. As you can see from the photo I utilized a dimmer switch in the supply line to the drill but soon discovered that I needed to be able to control the speed from above the table.

I now have a plug, on/off switch and the dimmer on long leads, these boxes are held together with a couple of magnets which allows me to separate them for storage.

Ok all works great but the dimmer I have, has the off position next to high speed and so I added an on off switch to the plug in box. The only really remaining issue is that I may want to move the reversing switch from the drill handle to the top with the rest of the controls. For now I simply use a small clamp to hold the drill switch in the full on position, and when I want to change the direction of rotation I have to remove the clamp, slide the reversing switch on the drill to the other position and re-clamp the drill switch. When I need to reverse the direction it is never in a situation where it has to happen quickly so this set up may continue to work.

Here’s a shot of my first piece with just a piece of cardboard as a table, I have since added a piece of MDF that screws to my bench top giving me a much more stable work space.

To control the paint/dye splatter I simply cut a couple of slots in a scrap piece of wood and bend a section of plastic laminate into the slots. Easily taken apart for storage. The photo below shows my first try at this when I was working with the fan motor above the bench top. I now have done away with the legs which are redundant.

Here are a few of my first attempts. I don’t consider anything I do a failure just an opportunity to learn. The photo of the unpainted/dyed silver maple was just that. It was easy to remove the unsightly dye and start over.

I am most interested in the ability to have the paint/dye move from the center or other locations in curved line.


February 4, 2018

Buffer for Wood Art

Filed under: Tools, Wood Lathe — Tags: , , , , , , — peteblair @ 1:22 pm

I am sitting in Kauai waiting for the rain to stop. I know, poor me, right? At any rate, I thought this would be good time to let anyone who is interested know what I have made to buff my wood art.

I should start by saying my journey started with the Beale Wood Buffing System. That’s the one with the three 8″ buffing wheels. It works like a charm but for me the closeness of the wheels to each other and the fact that I had to use my lathe made the system somewhat less than ideal. I do however continue to use the Beal Balls to do the inside of bowls, this I now do very infrequently.

I often watch local Auctions and saw a really nice two wheel buffer for sale. It had 2 12″ wheels, a 5 hp motor all on a stand etc.  I just had to have it. It was ok except for the fact that the buffing wheels were meant for metal or something and were sewn together in a spiral patters. I took a sharp knife and removed most to the sewing to make them a little softer. As you an see from this photo I had to make a few  modification. The wheels were set up to be in the center of the stand which wouldn’t allow me to access the buffing wheels as much as I needed. Another issue was the the motor needed to be physically moved to a different location any time I wanted to change the speed.

This buffer had 3 step pullys which did allow me with a little fussing to get a speed that worked. The problem was that the stand and set-up was just a little big for the space I have in my shop so I advertised and sold it locally. In retrospect I probably should have kept the parts and junked the stand but that’s water under the bridge.

I kept watching auctions and soon located a older but still very nice long shaft Baldor buffer. Got it home, set it up with my existing wheels but quickly discovered that the 3350 rpm speed was way too fast. I did a lot of research on the net to try to find a way to slow this puppy down without success. I must admit what with the technology available today that no-one (read here the Chinese) have not come up with a cheap speed reducer for a 110 brushless motor.  So once again this one went on the market and was grabbed right away. Oh, in the background you can see the Danish built bench grinder I also got at another auction. I didn’t even know it was included as it was hidden in the bottom of a metal cabinet I bought. Adding to that I didn’t know the Danes made stuff like this but it is a gem! Quiet, powerful and runs as true as any bench grinder I have see.

Before selling the Baldor I had decided that what I need to do was to build my own. Over the past many years I have collected quite a few bits and pieces of tooling and felt confident that with a small outlay of cash for a few items I would have no trouble making exactly what I need.

I should mention that while I had the Baldor I made 3 attachments one for each of the three buffing compounds I use Brown (tripoli), White (rouge) and Wax (carnauba). To make these I simply cut the heads off of 3 3/4″ bolts. I think I use 4″ bolts. I then drilled a 1/2″ hole it the end without the threads and drilled and tapped for a set screw to hold them in place on the motor shaft. By adding two nuts and washer I had easily replaceable arbours for my buffing wheels. I knew that my next model needed to be able to utilize these pieces.

On to the build. From Princess Auto I purchased two 1/2″ pillow blocks and a 5′ section of 1/2″ steel rod. I already had the bench, I wanted to share with the Bench Grinder so all that was left was to put a motor on the lower shelf, cut a slot for a V-belt and mount a length of 1/2″ shaft and the pillow blocks. I had a motor (1725 rpm) I had saved from a clothes dryer and also had a couple of 1/2″ pulleys. I didn’t take a photo but I do keep all three buffing heads in plastic bags to ensure I don’t add bits of metal or other items that might scratch my turnings. I raised the pillow blocks to get a more comfortable height for me and hinged the motor to allow it weight to tension the belt automatically. The pulleys are the same diameter providing me 1725 rpm but should I find the need to change speeds a simple pulley switch will do the trick.

Please don’t hesitate to ask or make suggestions for future posts or to comment on this one.

Older Posts »

Create a free website or blog at WordPress.com.